4. Annotation Instructions
We learned in the Tutorial how to control the MUSCIMarker application and use it to annotate objects in images. Now, we will talk about how to specifically annotate musical notation, so that the data you are creating will be useful for optical music recognition experiments.
Note
Whereas the rest of the MUSCIMarker documentation technically applies
to any MLClassList you might annotate, this section is specifically
designed to cover how to properly annotate the musical notation primitives
supplied with the annotation packages: mff-muscima-mlclasses-annot.xml.
Accurate annotation is absolutely critical to the success of our research. Therefore, you are expected to understand these guidelines fully. Mistakes may happen, of course, but if they happen at a frequency above some reasonable rate, you are going to see that reflected in your compensation.
If you do not understand something, please ask!
Questions, requests for clarifications (especially accompanied
by pictures of the problematic area) and generally communicating
with us will never be discouraged. The e-mail address to direct
questions to is hajicj@ufal.mff.cuni.cz
There is an example annotation that comes up as the default image when you start MUSCIMarker. Many situations are already in this example. Check it out! You can select a symbol and use the “i” keyboard shortcut to look at the annotation at the level of individual pixels, through the Inspection popup.
(The instructions do not deal with how to properly receive data and submit your work. For that, see Organizing your work.)
Note
Note for researchers: these instructions have been used to annotate MUSCIMA++ 0.9.x – For other versions of the dataset, refer to the appropriate version instructions.
We assume the reader is familiar with music notation terminology.
The instructions are organized loosely around the categories of symbols: notes themselves, notation, staff defaults (clefs, key signatures, etc.), layout-related symbols, text, and other stuff that may come up.
Do not forget to read the section on Precedence Edges below all the symbol-specific sections!
4.1. Guiding principles
Thee are a few things to understand first, before we dive into the specifics.
Pixels matter. Although you only see rectangles on the screen when you annotate objects, in the background, the exact objects are recorded: each pixel within the colored rectangle that you see has a Belongs/Doesn’t Belong label, based on how you traced the edges of the symbol. Use the i keyboard shortcut to view which pixels exactly are annotated as a part of a selected symbol.
Background does not matter. In black-and-white images, only the white pixels are ever recorded as belonging to a symbol.
All pixels in a symbol should be marked. So if you get intersections, such as between a stem and a beam, the intersection pixels just belong to both symbols. Belonging to one symbol does not exclude a pixel from belonging to another symbol. Intersections happen all the time.
Not all non-background pixels are part of a symbol. There may be non-background pixels that are a result of the writer’s mistake, or artifacts of the input mode (e.g. stylus on a tablet - sometimes, the tablet software might have preferred to make 90-degree corners or straight lines where it’s obvious there should be a curve…). It’s perfectly fine to leave these extra pixels out of the symbols you are marking. In fact, including such extra pixels would be a mistake.
Layered annotation. Sometimes (e.g. text, key signatures),
you will be asked to annotated the same thing with more markings.
For instance, a correct annotation of the key signature for D major
has two sharp annotations and a key_signature annotation
that covers all these symbols. This is because musical notation has
several layers at which it needs to be annotated: we need to know,
at the same time, that the symbols for key signatures are sharps,
and that these praticular sharps are part of a key signature.

Use your judgement. By definition, we cannot really enumerate
all the rules for annotating, as you will always encounter a new
situation with handwriting. Stick to the guiding principles, your
understanding of what the annotations should achieve (accurate markings
of the notation primitives that together form the musical score
you’re presented with), and it should help you decide what the appropriate
action is for most situations. If you really are not sure, even after
thinking about it and reviewing these guidelines, then send us an email
to hajicj@ufal.mff.cuni.cz!
Note
Validation
The MUSCIMarker tool includes functionality to check the current annotation
against errors. Press v to select all objects that the validation
algorithm suspects of having errors. However, validation is not perfect:
it is merely a helper, not a substitute for paying attention. For instance,
in the situation where two noteheads share a stem, validation cannot distinguish
whether it is a mistake (and the second notehead should be attached to its
own stem), or a chord (and the noteheads are legitimately bunched on the same
stem). If we could distinguish things like this perfectly, we wouldn’t need
annotation…
Passing validation, therefore, is a neccessary, but not sufficient condition of correctness. Sorry, you still need to really pay attention!
There are exceptions to passing validation with no suspicious objects. Sometimes (rarely), there will be non-standard notation situations where validation will complain even with correct annotation. This is a calculated “cautionary” behavior: if something like that happens, you had better be sure about it, because usually situations like this are a mistake.
We now give the instructions for individual symbol classes. Make sure
you understand them all. If there is something you don’t understand,
ask! (hajicj@ufal.mff.cuni.cz)
4.2. Notes
Primitives and note symbols. The first part of annotating notes is marking the notation primitives: notehead, stem, flags/beams.
Then, add the note primitive relationships. Select notehead-class
primitive (notehead-full, notehead-empty, grace-notehead-full,
grace-nothead-empty) and all other objects that are attached to the
notehead:
- stem,
- flag/beams,
- dots (duration, staccato, possibly other),
- ledger lines,
- sharps, flats, naturals,
- grace noteheads,
- tuple markings
- other notations: slurs/ties, articulations, tremolo marks, dynamics, etc.
(This is not an exhaustive list.)
Caution
Do not have more than one notehead selected when auto-adding relationships with p. It can very easily lead to spurious edges (see Annotating Relationships in the Tutorial).
For slurs and dynamic hairpins (cresc./decr.), attach them to all the noteheads that they affect.
Tip
The fastest way of selecting a bunch of primitives is to use the Obj. Select tool. If you have Active Selection turned on in the settings, it will “pre-emptively” light up the current selection as you draw the lasso, making it easier to know whether the right symbols are being selected.
We will now walk through some examples, going from individual notes to more complex situations.
4.2.1. Simple notes
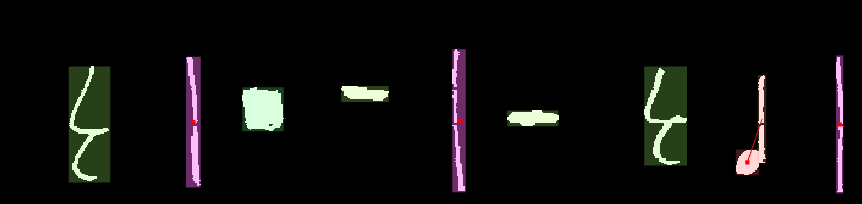
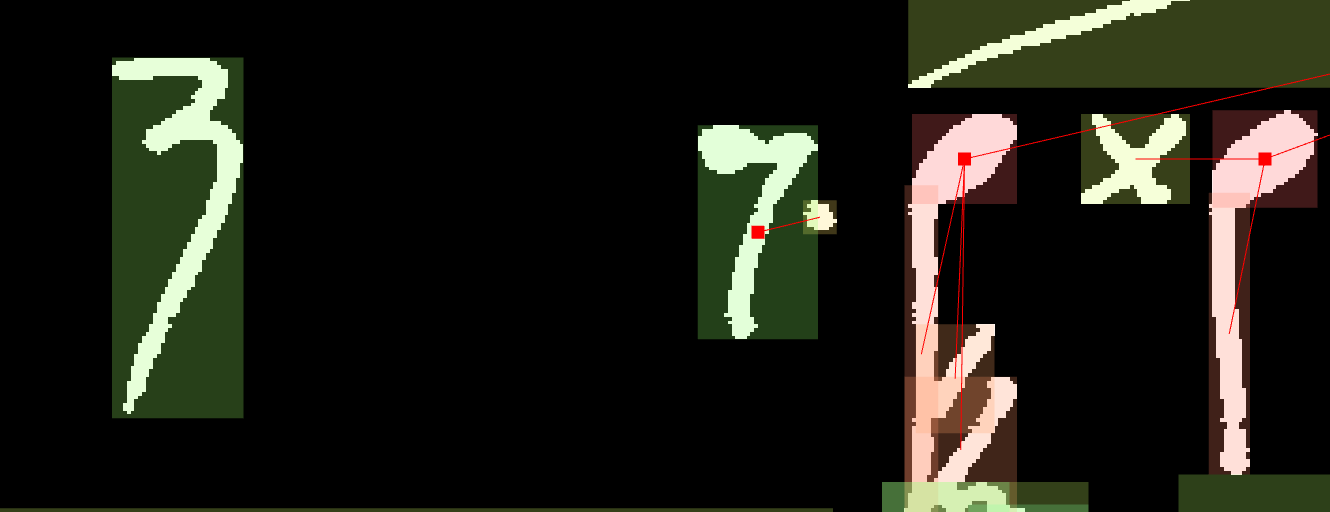
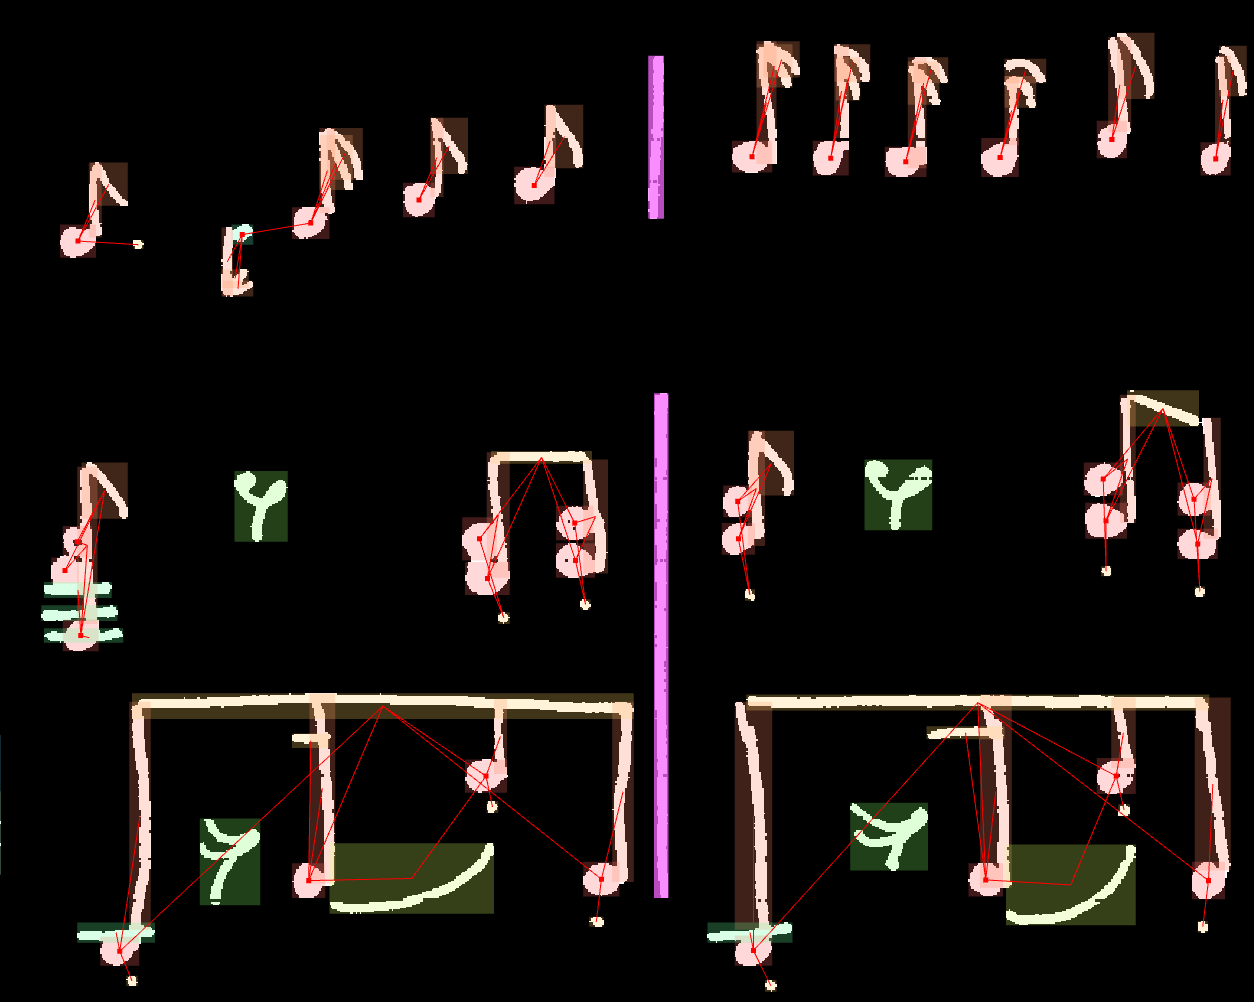
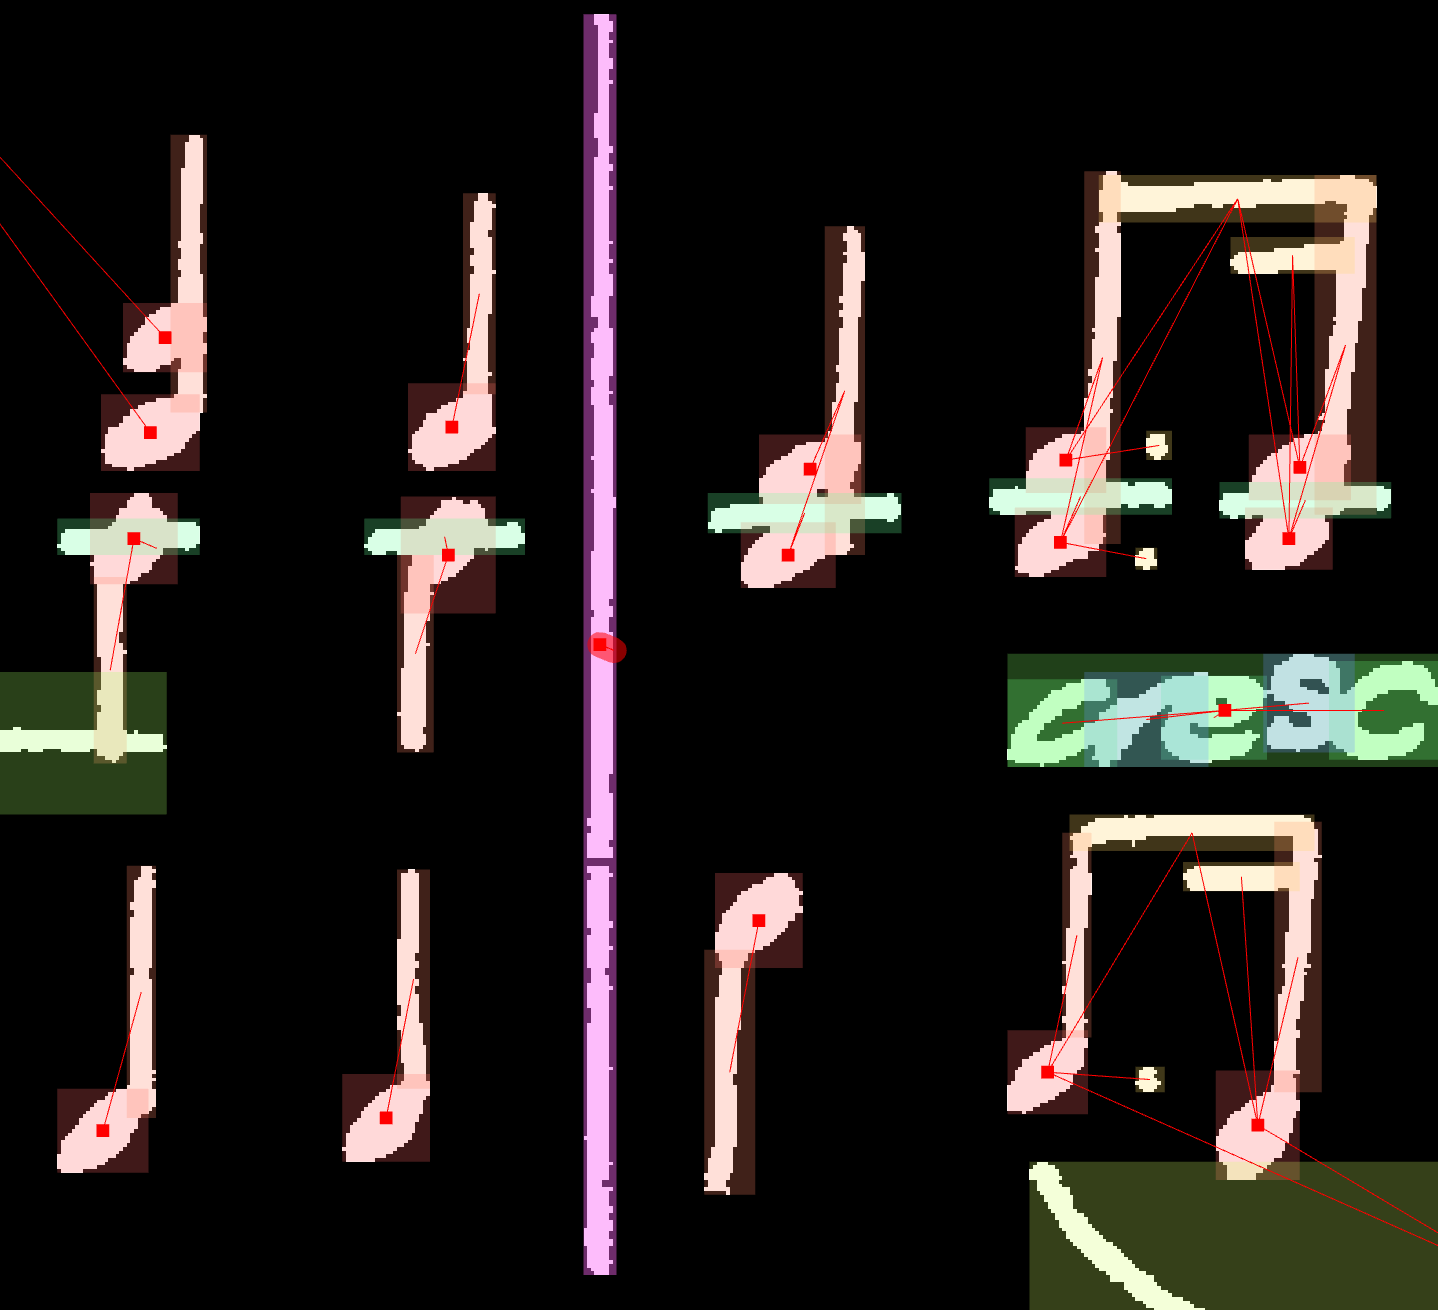
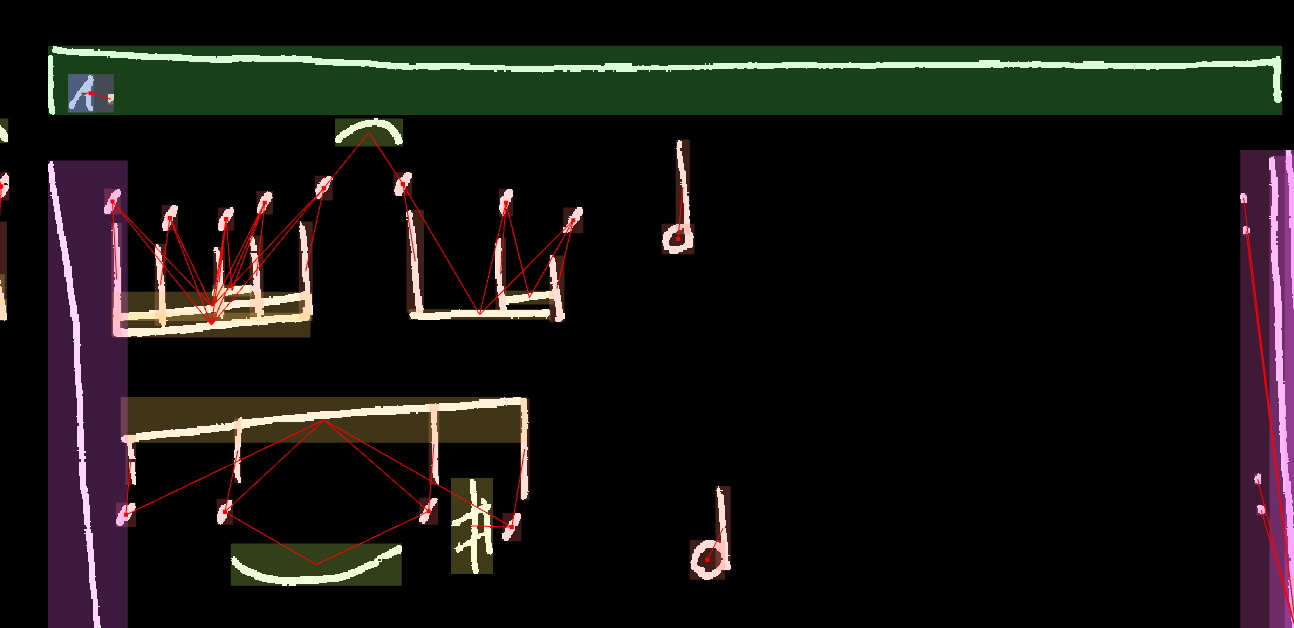
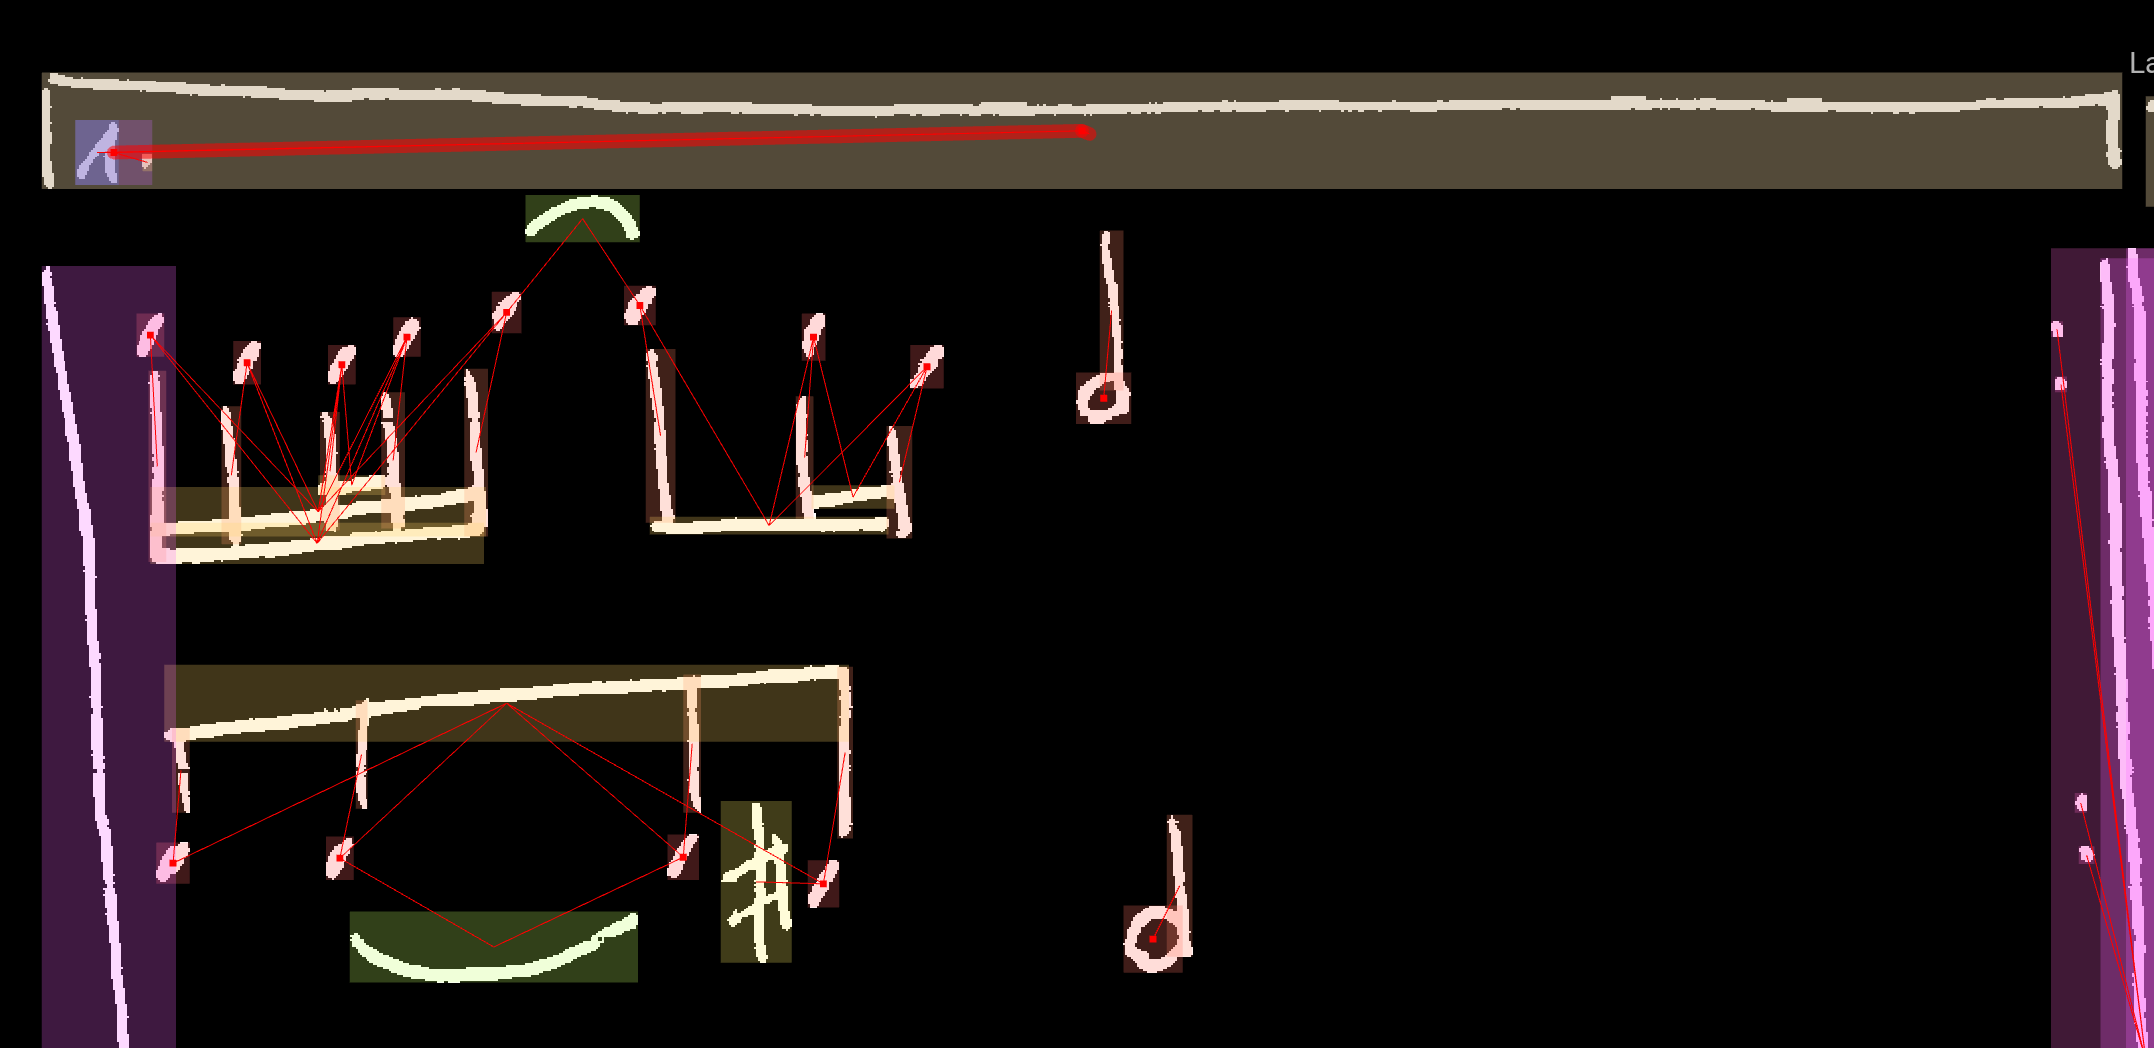
Isolated notes, one with a ledger_line, one with a 8th_flag:
A simple beamed group. Notice how the two noteheads share one beam,
but only the 16th note links to the second beam.
(The dot is a duration_dot). :
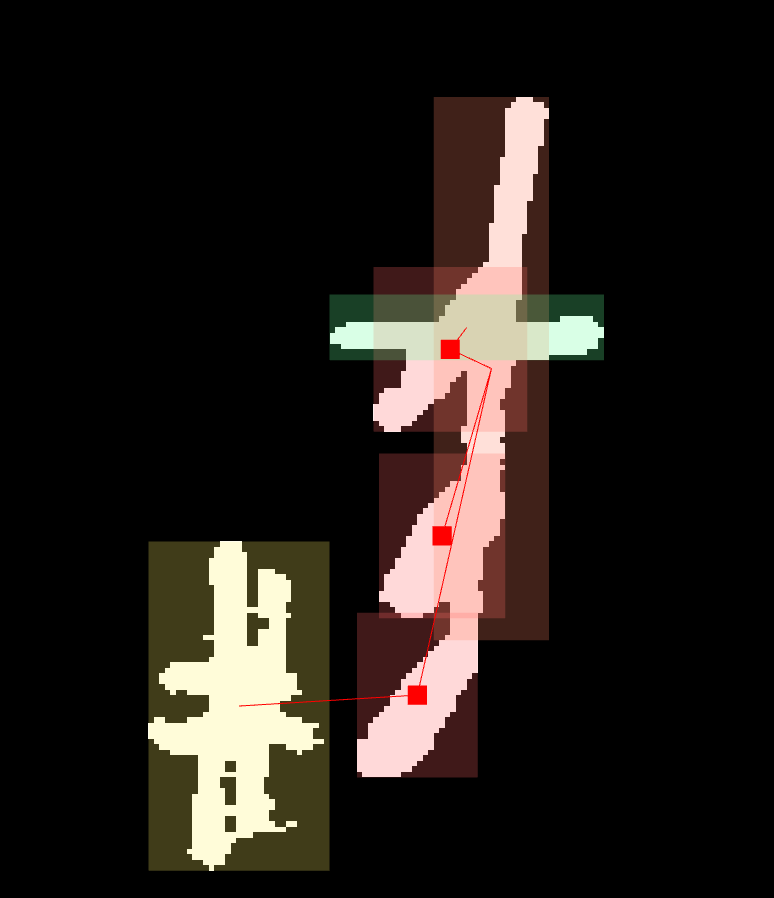
A more complex beamed group, with multiple types of notes. The 8th note
only links to the outermost beam; the 16th and 32nd notes link to
the outermost and the second beam, and finally only the two 32nd notes
in the middle link to the third, innermost beam. This illustrates
the principles of only linking those primitives to a notehead that actually
affect how we read the notehead.
Rests are simple symbols - regardless whether quarter, 8th, 16th, etc., or even multi-measure rests, like in the following example (note also that it is indeed possible to tell apart whole and half rests, even without staff lines):
And don’t forget that rests can have a duration_dot:
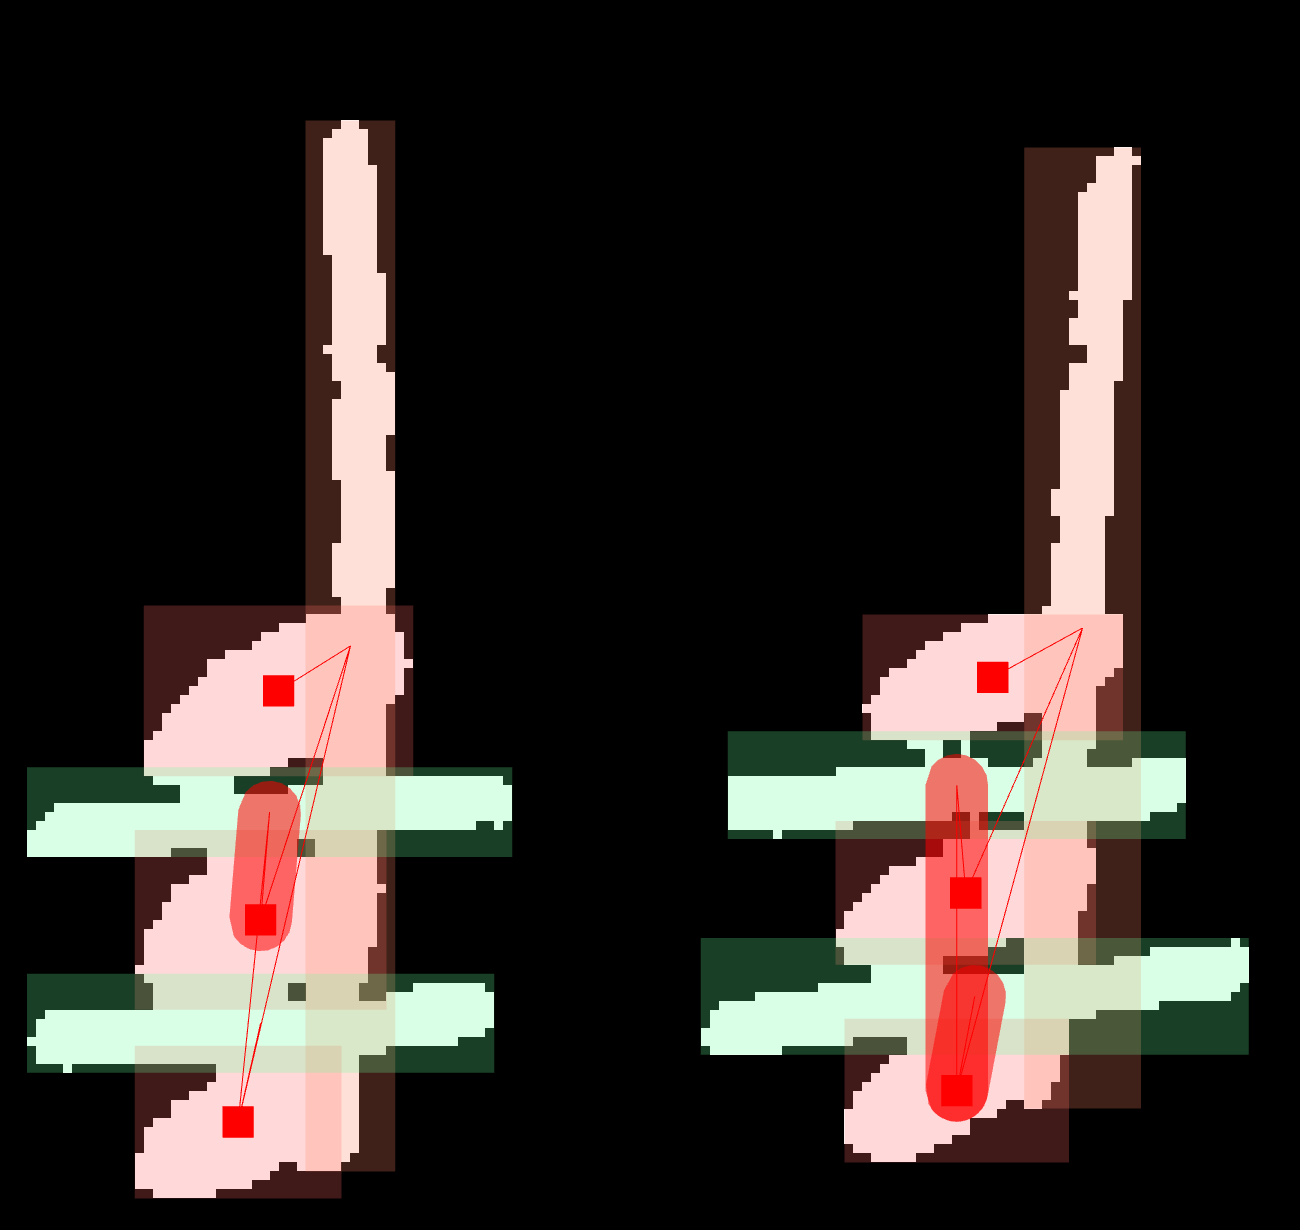
4.2.2. Chords
In a chord, the noteheads do not interact. This implies that they share the stem, they share beams and flags, slurs, etc., but e.g. accidentals (flat, sharp, …), ledger lines, ties or ornaments only have a relationship to the notehead which they directly affect. This should not be surprising – it’s the same principle all over again.
Some chords in a beamed group:

Chords can be tricky, especially with ledger lines. Make sure to only attach those ledger lines to a notehead that actually affect its pitch! Visually, this means all the notehead – ledger line relationships lead one way: either down (if the notes are above the staff), or up (if the notes are below the staff). The stem is, of course, shared by all the noteheads in the chord.
4.2.3. Grace notes
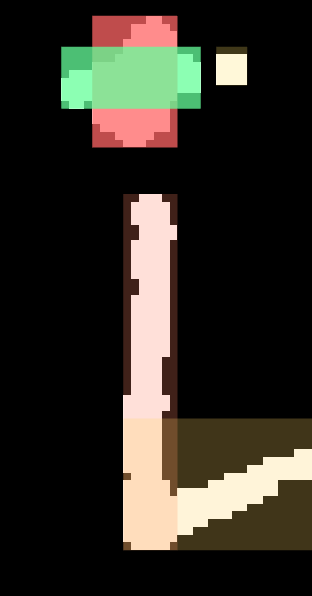
Grace note (grace-notehead-full) with its “main” note (notehead-empty).
They and their relationship is highlighted. The slur connecting the two notes
is shared between the two notes. (However, their direct relationship would still
be there, even if the slur wasn’t.) Notice also the two flags on the isolated
grace note: the outer is an 8th_flag, the inner is a 16th_flag.
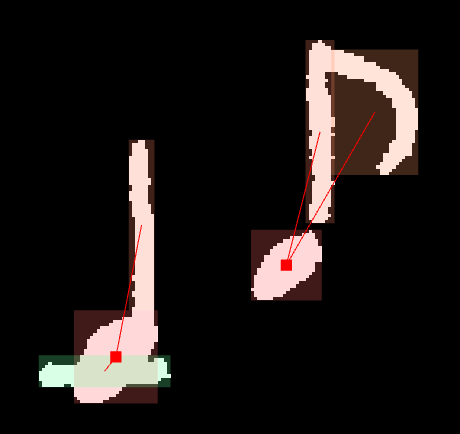
The “strikethrough” on a grace note is attached to its stem, not the notehead (the relationship is highlighted). Notice also the interaction between the grace note and the following chord.
If there is a clear voicing relationship between a grace note (or a grace note
chord) and a “main” note chord, the grace-notehead-* to notehead-*
relationships should respect voices (highlighted; the relationships to the slur
on the bottom are omitted for clarity):
4.2.4. Putting it all together
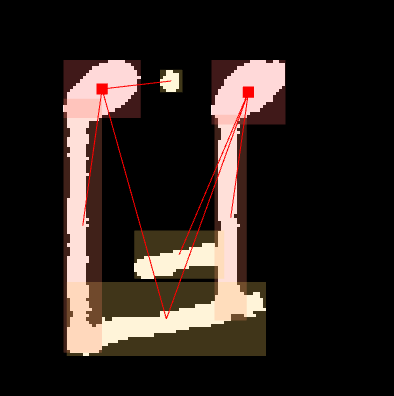
Let’s have a look at a complex notation situation which combines all these elements:
Make sure you understand the reasons for the following:
- The short beam is only connected to the last notehead.
- The natural signs are connected to only one note.
- The arpeggio “wobble” is connected to all three notes of the chord.
- The grace note is only connected to the bottom two notes.
- The top note in the chord connects to the top stem, the bottom two notes to the bottom stem.
- It is not clear whether to connect the grace note to the top note of the chord or not. (Same for the top note and the bottom slur: both variants are possible.) This is a more polyphonic reading which considers the topmost note as a part of a separate melodic voice.
- The accent is connected to all three notes in the chord (it’s a piano score).
4.3. Other notation
In the section dedicated to notes themselves, we have also illustrated some basic principles of how to attach objects to each other. We will now define some more notational situations around notes:
- tuples
- accents and articulation
- arpeggios and glissandi
- caesurae, breath marks
- tremolos
- segno, coda
- ties and slurs
- crescendo and decrescendo “hairpins”
- tuples
- fermatas
- ornaments
- trills
- transposition
- instrument_specific
Accents, articulations, caesurae and breath marks, tremolos, arpeggios & glissandi should be clear: mark the symbol and connect it to the noteheads which are affected by the marking. Caesura/breath mark, segno and coda signs do not connect to anything.
4.3.1. Tuples
Mark the tuple numeral as any other numeral. If there is a bracket or
a line that denotes the extent of the tuple, mark it as tuple_bracket/line.
Then, add a tuple symbol as an overlay of the numeral(s) and the tuple
bracket/line symbol. The tuple has outgoing relationships to the numeral_X
symbol(s) and the tuple_bracket/line.
Next, connect all the noteheads participating in the tuple to the tuple symbol.
The result will look like this (highlighting the relationship of tuple
to numeral_3 and tuple_bracket/line, and the three participating
noteheads that have a relationship to the tuple):

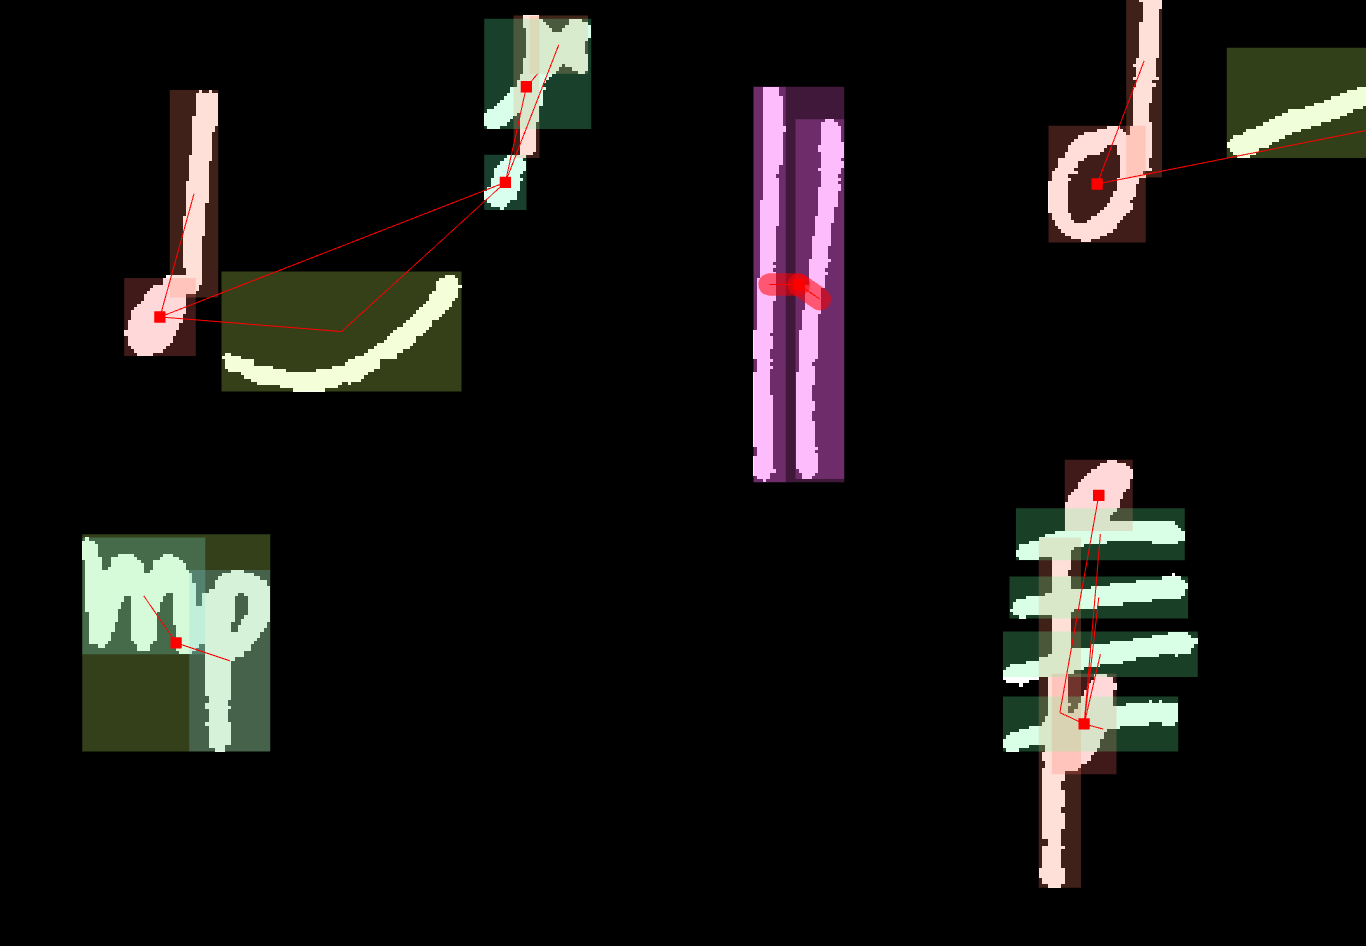
4.3.2. Ties and slurs
Mark relationships to the symbol from all affected noteheads. With ties, this will generally be 2; with slurs, there may be a lot of notes:
In multi-voice scores, pay attention to voice leading: use your judgment to determine which voices the slur applies to. The previous example in fact illustrates this as well: notice the middle voice notes which are not marked as belonging under the slur:
If a tie/slur leads from one line to the next: annotate each “half” separately and attach the notes only to the given half.
If there is just one note with a slur at the start or end of the line, like in the example above, validation will complain, but you can safely ignore that. (Just make sure that both ends are marked the same – in fact, the example had to be corrected: one end was marked as a tie, the other as a slur.)
4.3.3. Crescendo and decrescendo hairpins
The same rules apply to hairpins denoting crescendo and decrescendo that apply to slurs: connect all affected noteheads. Use your judgement to determine how these markings apply to noteheads at their left and right edges.
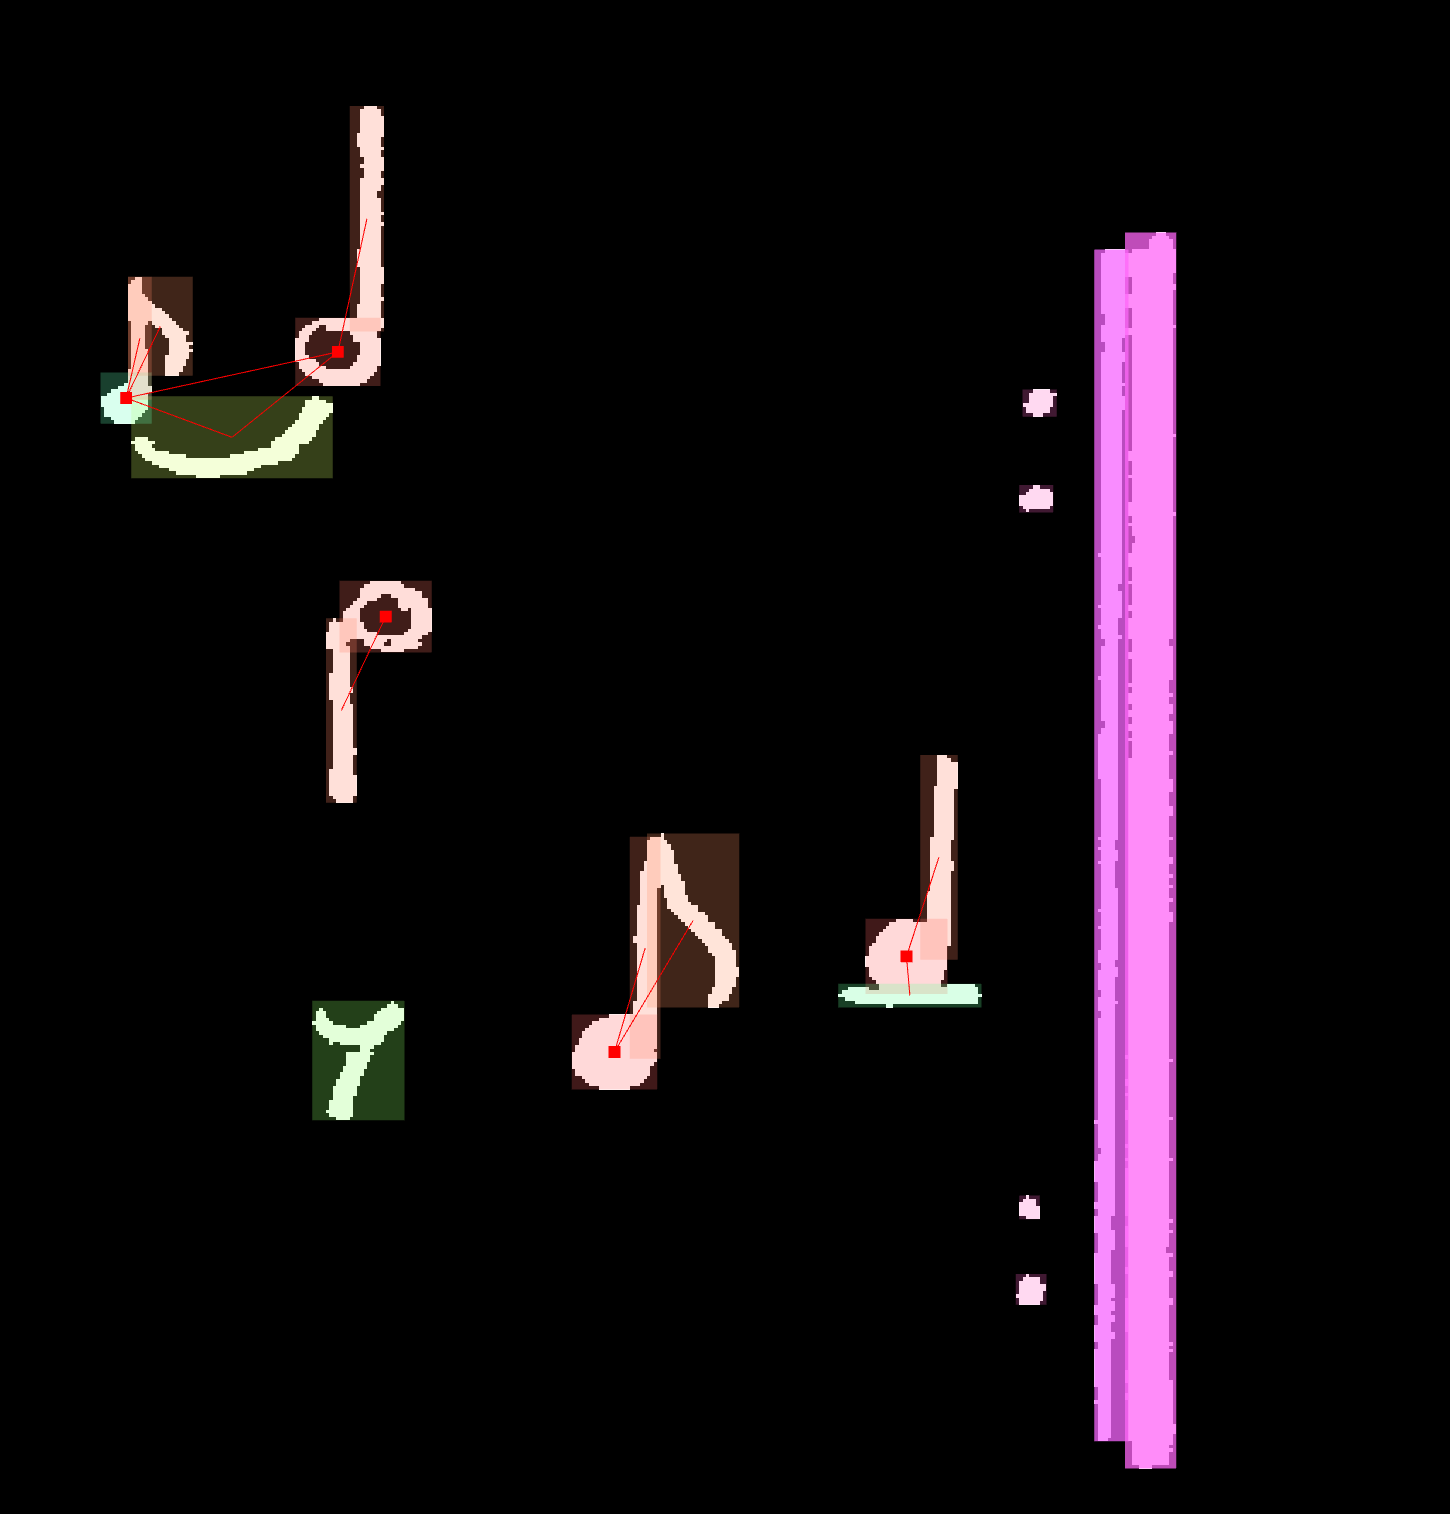
4.3.4. Fermatas
Fermatas are attached to a notehead-class object, a rest,
or a measure_separator, if they are clearly related
to a barline (or a double barline…, see measure_separator
guidelines below). Here is a fermata attached (arguably) to a rest:
And to a measure_separator that consists of the two barlines
(which also happen to be part of a repeat):
In case a fermata is written above an empty space, or otherwise cannot be resolved, leave it unattached (even though validation will complain).
4.3.5. Ornaments
All ornament markings that have a graphical representation independent on the notes
they are attached to (mordents, turns, etc.)
are annotated using the ornament(s) class. We currently do not distinguish
between these symbols. These are some (poorly written) ornaments - a mordent, and
a short trill:

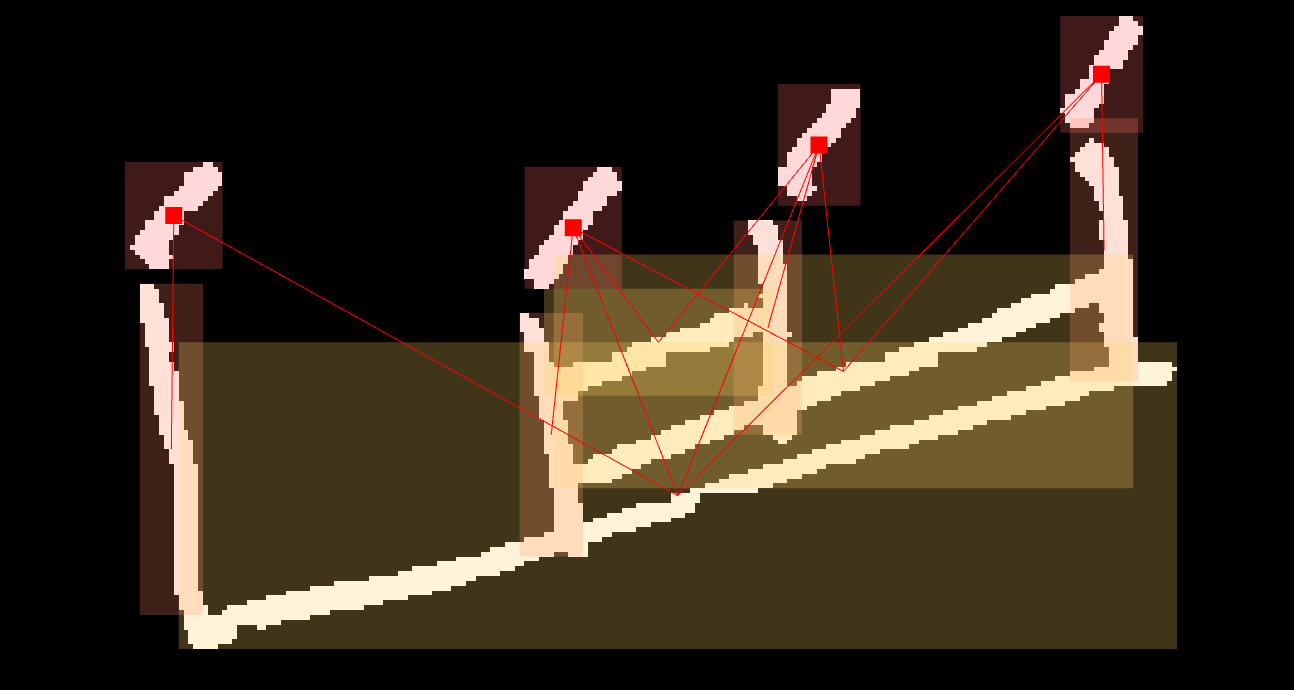
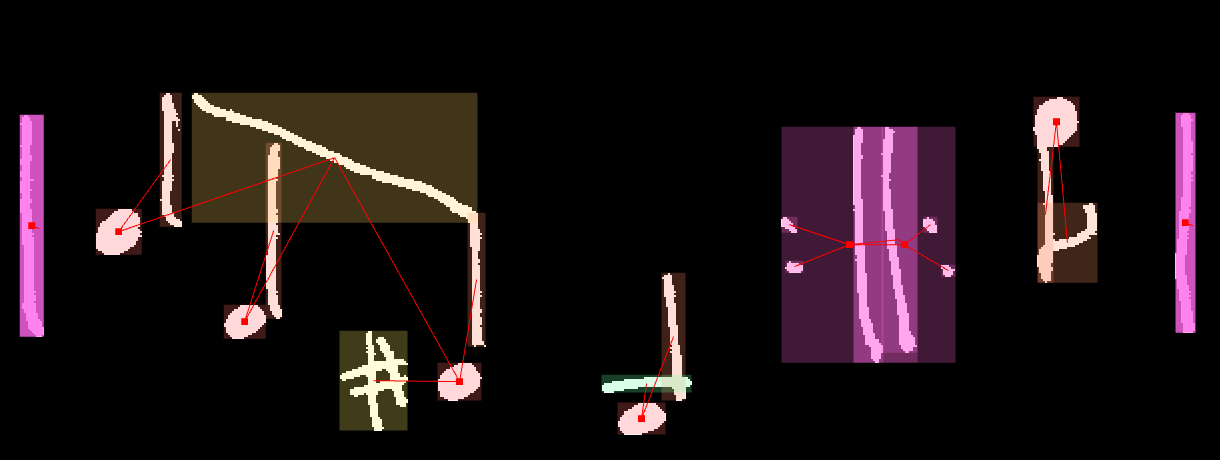
4.3.6. Trills
Long trills are more complex, and they consist of several components.
There is always the “tr” marking (or just “t.” in some early music),
the wobbly line to the right, and potentially some accidentals to be applied
to the trill’s upper or lower note. In some cases, the “tr” text will be
surrounded by brackets. Finally, notes affected by the trill connect to
the overlay trill symbol.
The “t” and “r” are letters: letter_t and letter_r. They are joined
under the trill overlay symbol, which has relationships leading to the
letter symbols, and the corresponding notehead attaches to the trill.
(components participating in the basic trill highlighted):
If an accidental is present, attach it to the trill object as well:
If the wobbly line is present, mark it using trill_"wobble" and add
a relationship from the trill to the trill_"wobble":
Note that all the affected noteheads also link to the trill:
Brackets, if present, are annotated as letter_other and also connected
to the trill symbol:

4.3.7. Transpositions
Transpositions are similar to voltas. They consist of a horizontal
spanner, numerals (8, or 1 and 5), potentially letters (“va” or “me”),
and a horizontal spanner (sometimes dotted, sometimes not). The overlay
symbol for transposition, analogous to the volta symbol, is transposition_text.
However, as opposed to the volta, it directly connects to the
letters and numbers, instead of an intermediate other_numeric_sign,
and its mask does not include the spanner. This is because
transposition_text is also sometimes connected to clefs,
where it has no spanner (and is valid for the entire staff).
4.3.8. Instrument-specific
Aside from the general music notation universal to nearly all instruments, there are some symbols that denote techniques specific to certain instrument classes (such as the flageolet for strings and winds/brass, but not - or rarely - piano; up-bow and down-bow markings for strings, pedal markings for the piano, unorthodox fingerings for woodwinds).
We do not currently distinguish between
those, as it would bring huge complexity and furthermore would place undue burden
on annotators not familiar with these markings. (After all, not even composers
know them all!)
All these symbols are annotated simply as instrument_specific.
4.4. Layout
In this section, we will discuss objects that are related to the overall layout and structure of the music:
- barlines
- repeat, repeat dots
- measure separator
- staff grouping symbols
- system separator
- horizontal spanners
- volta
- transposition spans
- ossia
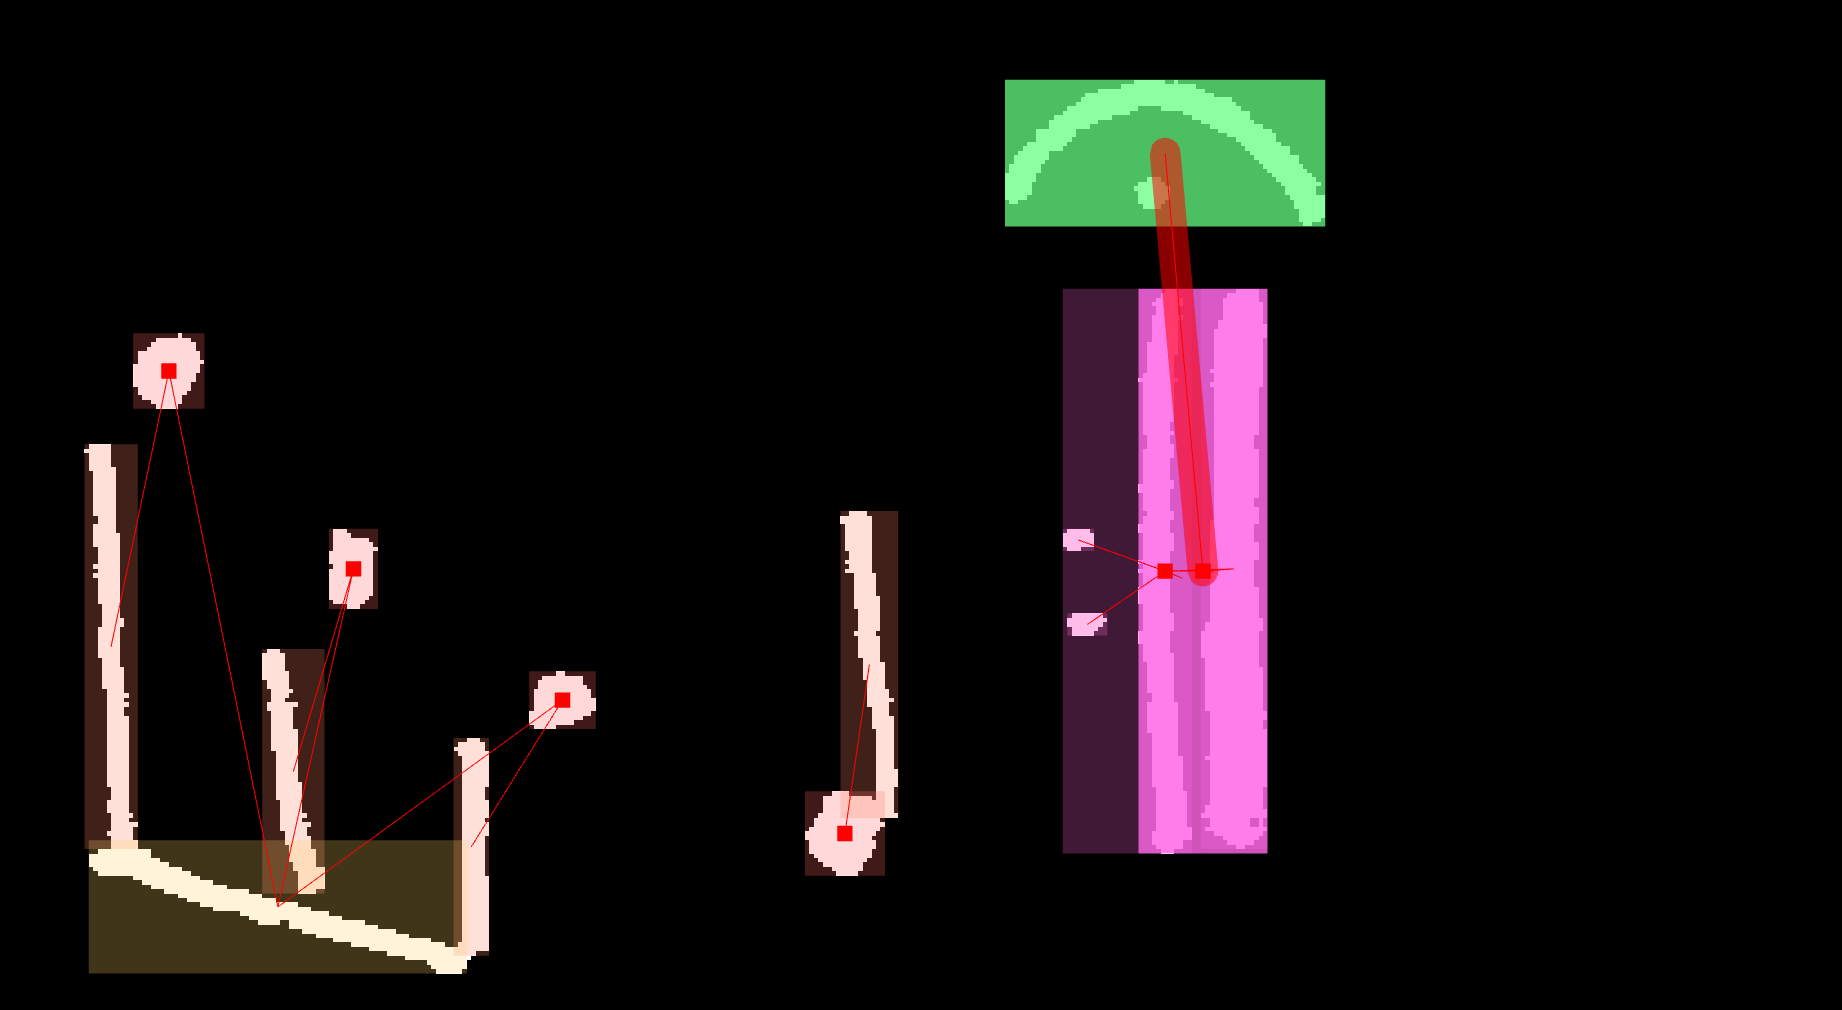
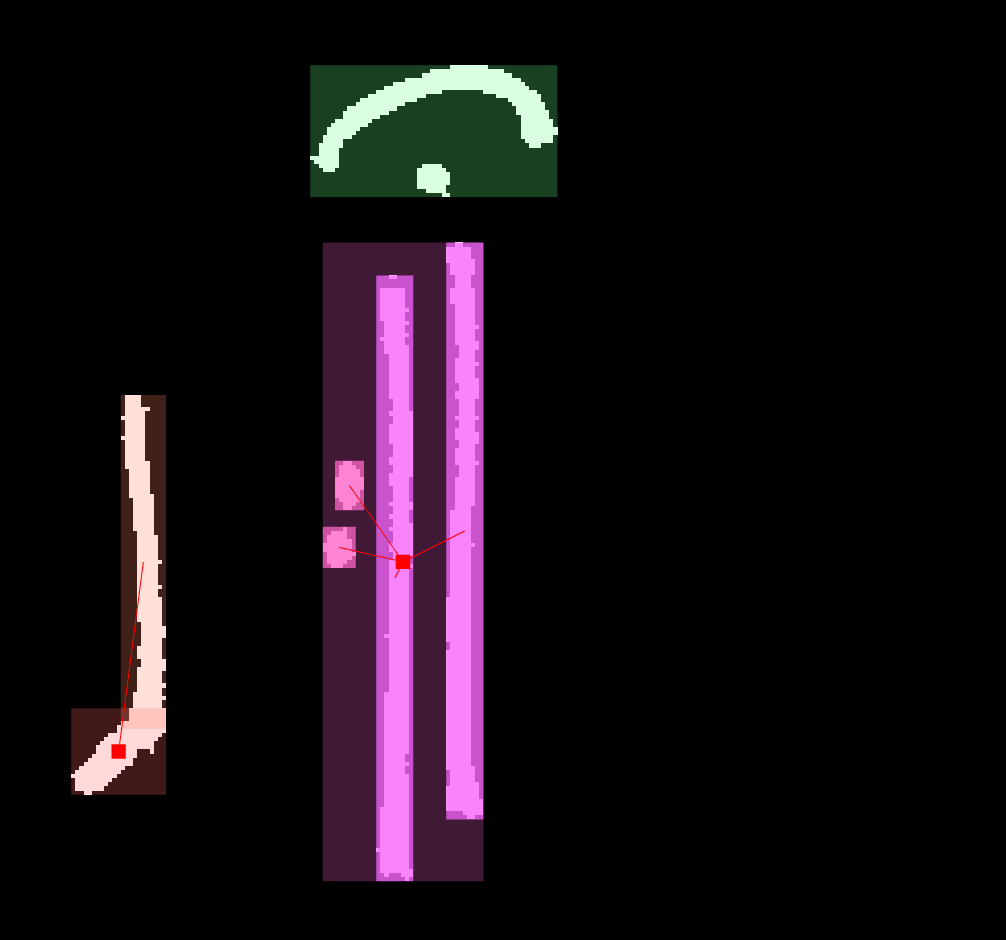
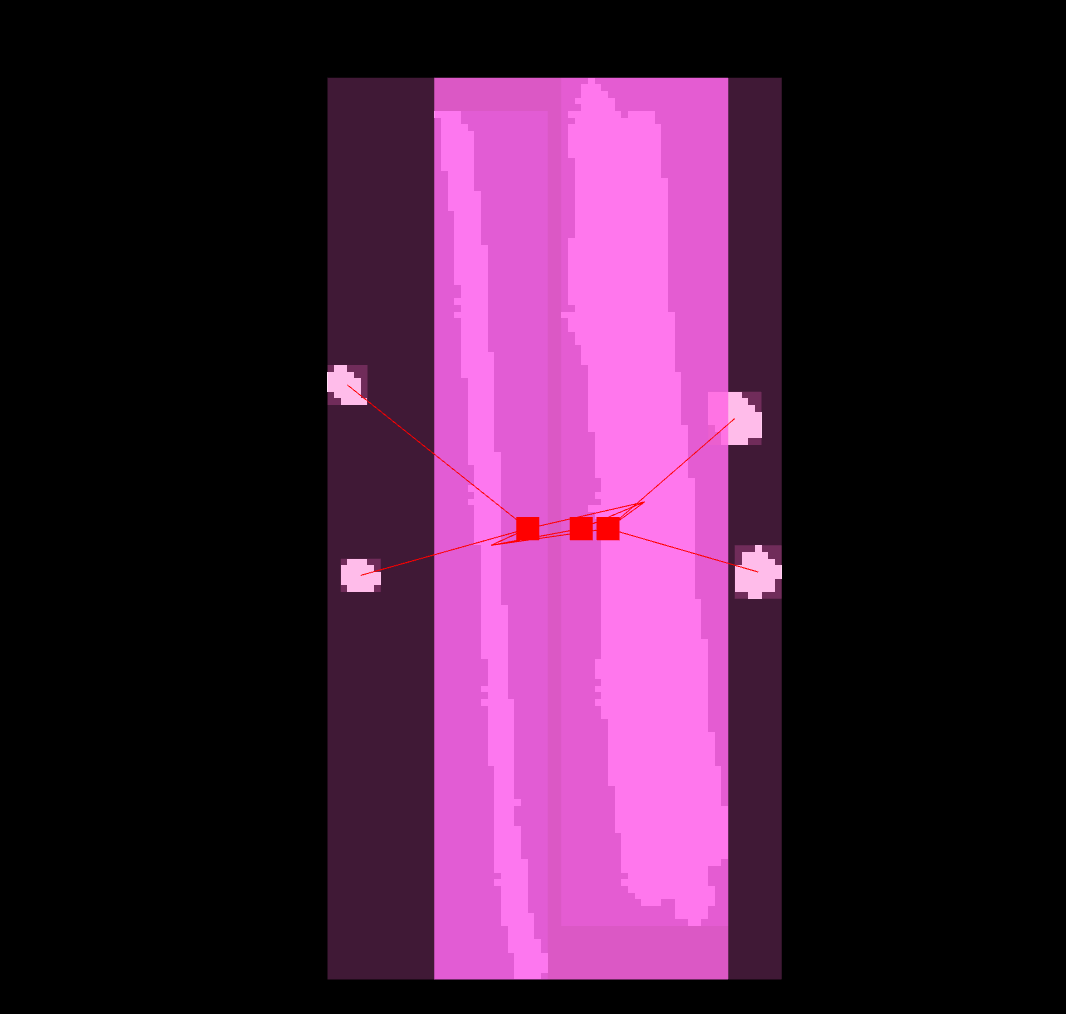
4.4.1. Barlines
There are three kinds of barlines: thin, thick, and dotted.
(The dotted_barline class applies to any non-contiguous barline.)
Note that barlines are “low-level” objects, notation primitives:
one barline does not automatically equal a measure boundary (e.g.:
double barlines, barlines in repeats, barlines denoting the grouping
of staffs into systems). For example, this double barline is annotated
as two thin_barline symbols:
The difference between a thin_barline and thick_barline is
basically just intent: if you think the writer just drew one line,
mark it as a thin_barline; if you think the writer made an attempt
to make a barline thick, use thick_barline. Here, we have a print-like
combination of barlines in a repeat:
Sometimes, what would be typeset as a thick barline will be written out
as a thin_barline:
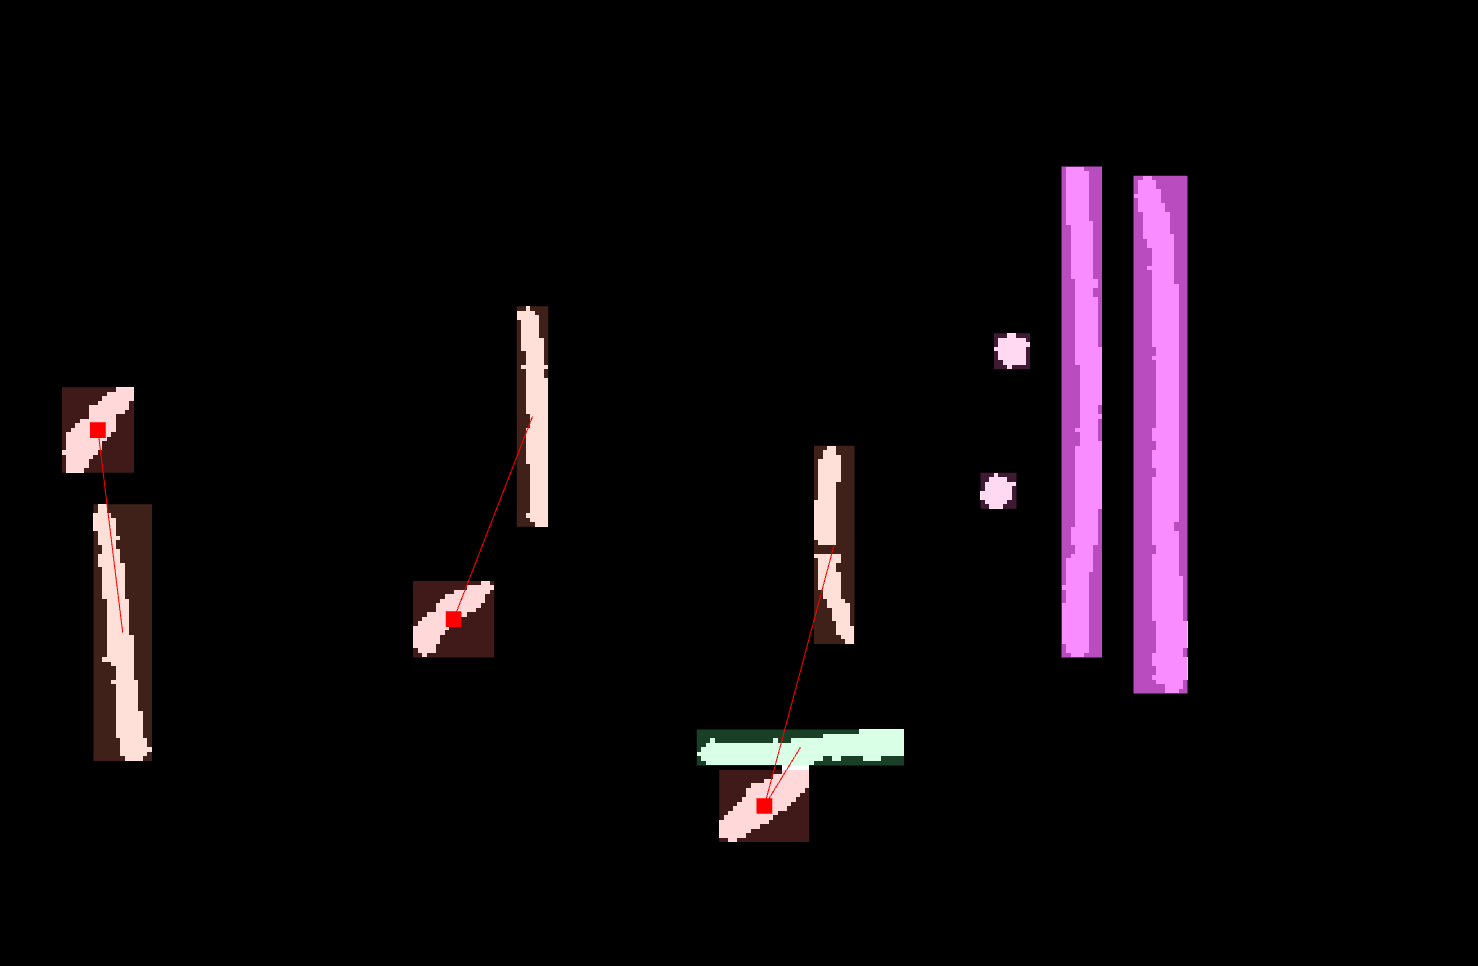
In multi-staff music, don’t group per-staff or staff-group barlines
together under one! This is handled by the measure_separator
object (see below). These are two separate thin_barline objects:
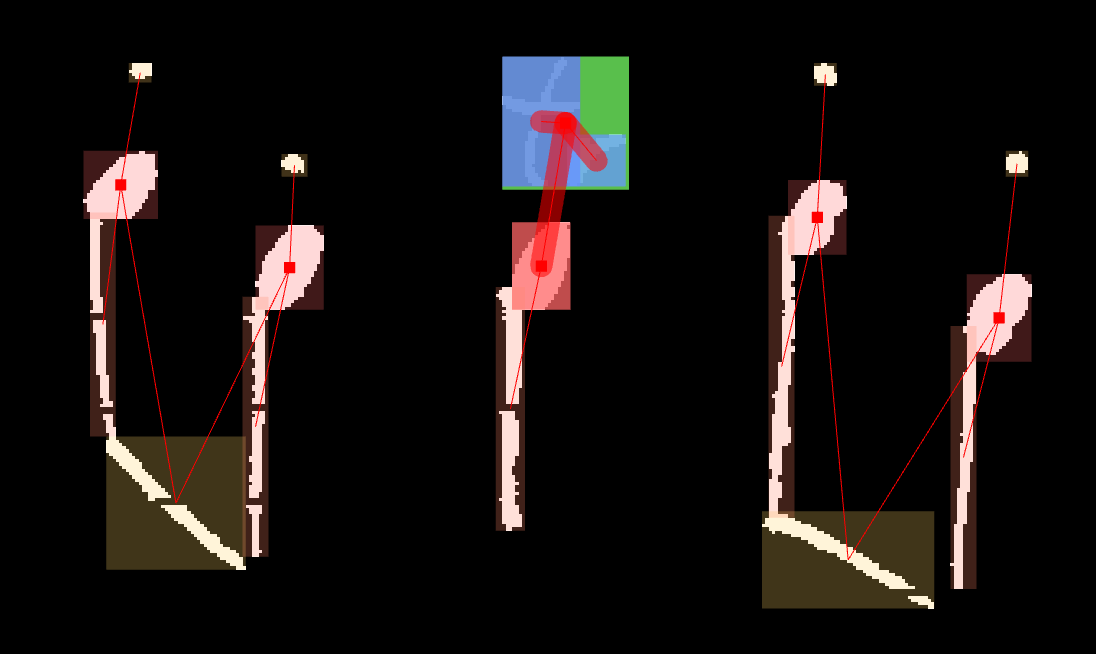
4.4.2. Repeats, repeat dots
The repeat symbol is a high-level symbol that consists of barline
and repeat-dot primitives:
Back-to-back repeats share barlines:
Repeats that span multiple staves form a single repeat object
(with many repeat_dot “subordinate” primitives):
4.4.3. Measure separators
Barlines are not the end of dividing a piece into measures. There are double barlines, repeats, or back-to-back repeats, all of which break the assumption that 1 barline == separation between two bars.
In order for our data to correctly indicate both barlines and separation
into measures, we use the measure_separator overlay symbol. The rules
are simple: any number of barlines that delimit one measure from another
is grouped under one measure_separator, be it a single barline,
double, or barlines inside repeats.
For example, a single barline is also a measure separator (the relationship
from the top-level measure_separator object to the thin_barline
primitive is highlighted):
A double barline is just one measure separator:
In a repeat, the barlines together form one measure_separator.
When the repeat is back-to-back, sharing the barlines, there is
logically still just one measure_separator – it indicates just
the boundary of just two measures, nothing else. In other words,
just like there is no interaction between notes in a chord, there is
no interaction between repeats and measure separators. In the following
example, the measure_separator object is highlighted:
It’s hard to see, but it only has relationships to the two barlines.
The repeat symbols, on the other hand, also have relationships
to the repeat_dot primitives.
In multi-staff pieces, the measure separator should span the whole system,
again following the principle of one measure_separator symbol per measure
boundary. The barline might be a long one or many short ones, it doesn’t matter:
Warning
Not every repeat hides a measure_separator inside! For instance,
here, the repeat comes before an Auftakt, a pickup 8th. If you
annotated a measure_separator here, the measure count would
be wrong!
The same warning applies to repeats at the start of a new system. The MUSCIMA++
annotation policy is: only the previous end-of-line barline(s) form
a measure_separator, the start-of-line repeat sign does not necessarily
“hide” one. This holds even if there is no barline at the end of a line: that’s
an ambiguous situation anyway; and we can then use the presence of a repeat
at the start of the next line to decide that yes, indeed, there should
be an “invisible” measure_separator there. But that is a post-processing
step, not an annotation step that you should be concerned with.
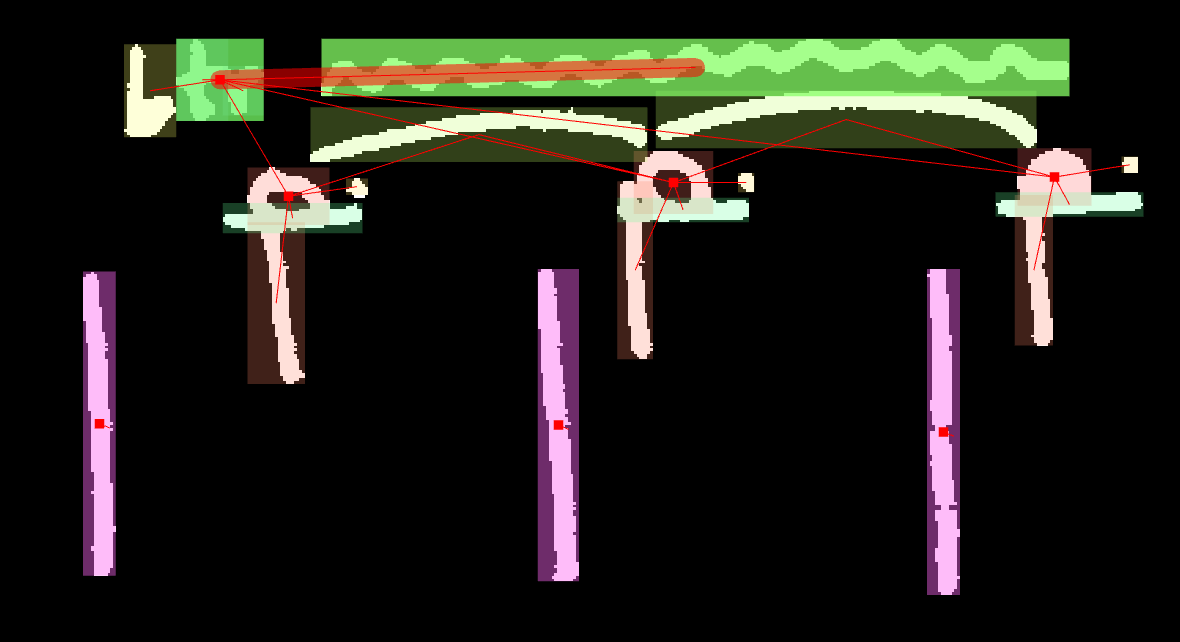
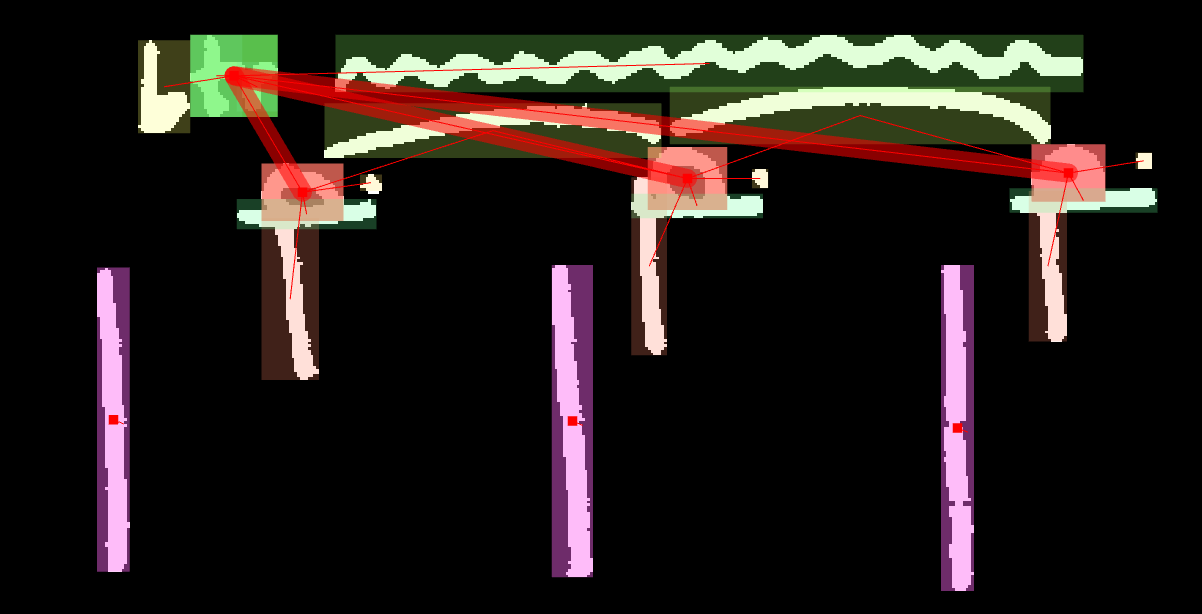
4.4.4. Staff grouping symbols
There are notation primitives that indicate which staves are part of the same system, and which staves are a group within a system (e.g., right and left hand staves for a piano part). These are:
multi-staff_bracket(the “horned” one)multi-staff_brace(the “curly” one, rarely spanning more than 2 staves)thin_barline(a simple line) or, rarely,thick_barline
You will practically always find these symbols at the beginnings of systems.
In this example, there are two brackets, one which spans all staves and one for the bottom four, and one brace:
Then, the staff_grouping higher-level symbol indicates how these
primitives work together to actually perform staff grouping. This symbol
can be a parent of another staff_grouping, to indicate sub-groups.
The subgroup only contains the primitive that delimits the given subgroup
(usually the curly multi-staff_brace). The following example illustrates
three relationships:
- the top-level
staff_groupingto themulti-staff_bracketwhich indicates that the largemulti-staff_bracketdefines a grouping (short red line on the bottom), - the bottom-level
staff_groupingto its ownmulti-staff_bracket, which indicates that the smallermulti-staff_bracketalso indicates a staff grouping (short red line near the top), - the top-level
staff_groupingto the bottom-levelstaff_grouping, which indicates that the second staff group is a subgroup of the first one.
Caution
This is one of the situations where you will have to use the “a” keyboard
shortcut to attach symbols to each other. If you used “p” to create
relationships automatically, you would get an extra relationship from the
sub-group staff_grouping to the top-level staff_grouping, as well
as the “downward”-pointing arrow in the staff groups hierarchy.
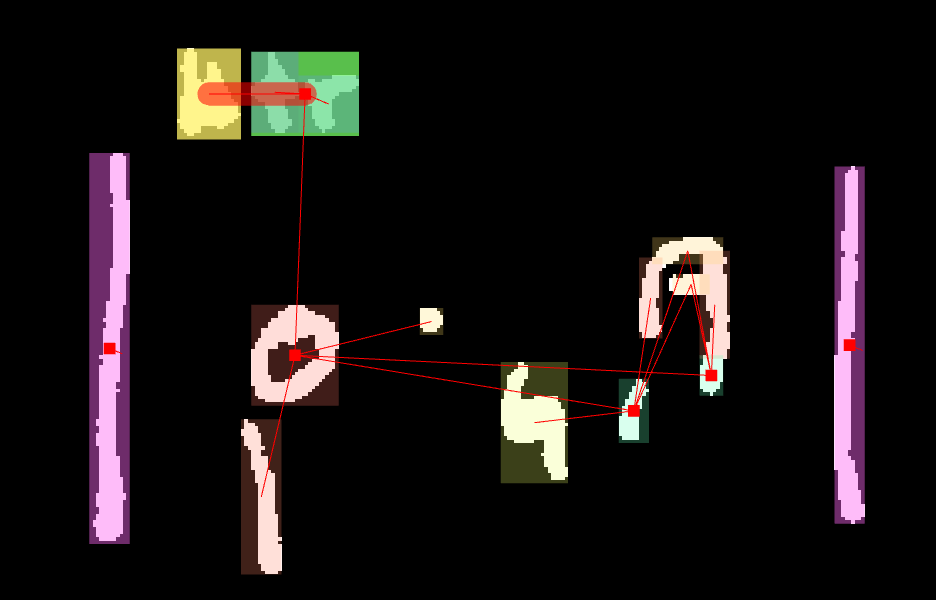
4.4.5. Volta
The volta is a relatively complex construction. Like the key signature or time
signature, it is a top-level symbol that consists of some others. The components
of a volta are, canonically, a horizontal_spanner and an other_numeric_sign.
The numeric sign consists of a numeral_X (1, 2, 3, etc.), possibly an other-dot
after the numbers, or letter_other for commas, parentheses, etc.
These are the components of a volta (spanner in green):
And the volta goes on top of this all, with relationships to the spanner
and the numeric sign highlighted (the spanner relationship is very short, as
the bounding box of the volta is in this case identical to the bounding
box of the horizontal_spanner component):
4.4.6. Transposition
The transposition mark is somewhat similar to a volta: it also consists of some
numeral or text (usually “8va”, or just “8”) and a horizontal spanner (usually
dotted, so a dotted_horizontal_spanner symbol). The text, which encompasses
the numeral(s) and the letters (and the occasional dot), is called
transposition_text. The difference is that while voltas encompass the horizontal
spanner (if present), transposition_text does not.

This is because the transposition text may often be attached to a clef
(indicating an octave or two-octave transposition of the entire part), with no spanner.
However, as the transposition_text has a relationship to its horizontal
spanner, when present, this is just an aesthetic choice.
4.4.7. Ossia
If you come across an ossia section, annotate it like normal notation,
then mark the entire area as ossia (take care to include all the foreground).
You do not have to add any relationships to or from the ossia symbol.
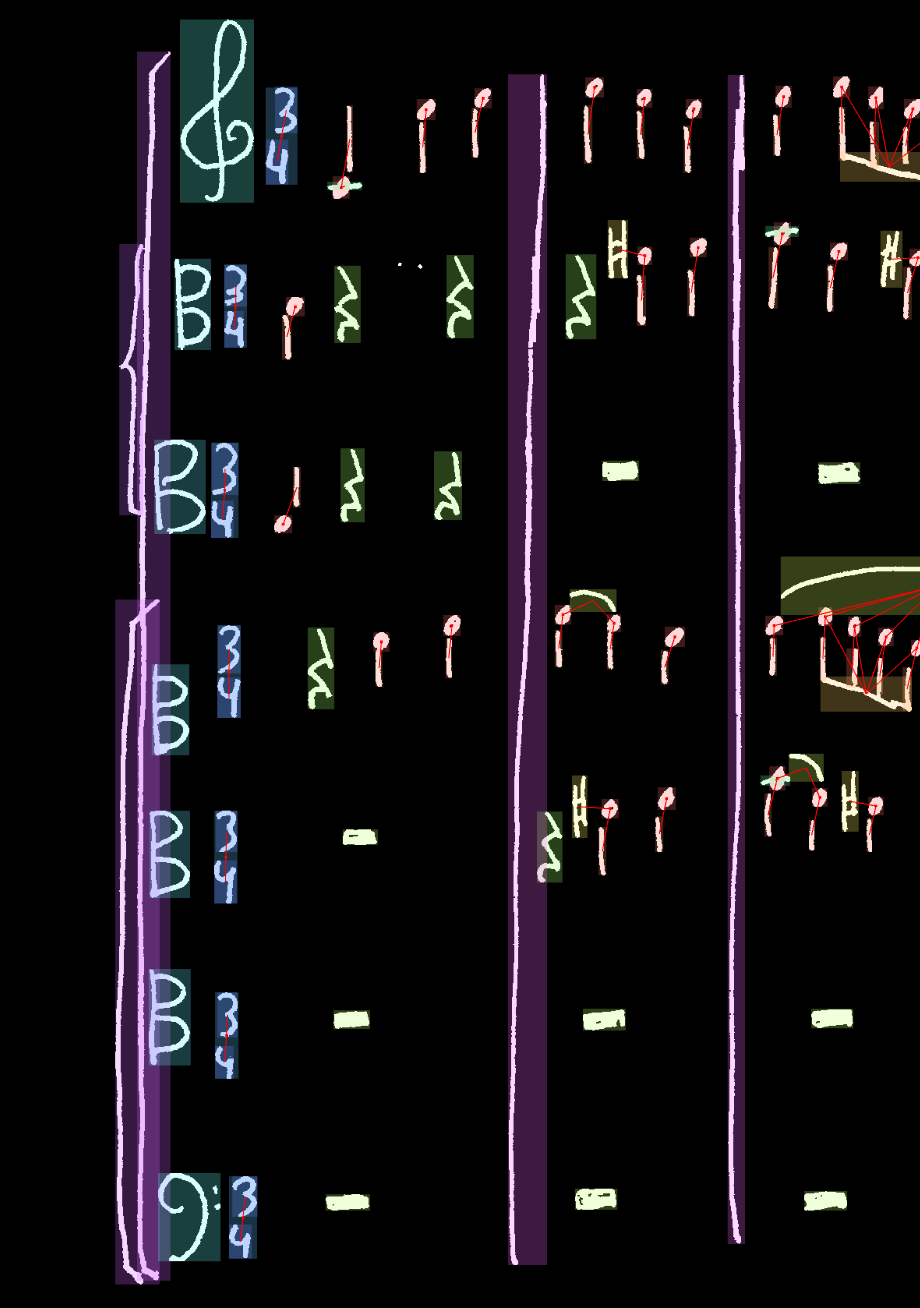
4.5. Part defaults
- These symbols are instructions that affect the interpretation of the
- entire staff, something akin to a “preamble”. They includes:
- clefs
- key signatures
- time signatures
Clefs are simple objects: g-clef, c-clef, or f-clef according
to their shape.
Key signatures are two-level: mark the accidentals normally
as sharp, flat, or natural (these happen when “inline” key signatures
cancel the effects of previous key signatures), and then overlay all of them
with the key_signature supersymbol (and add relationships from the key_signature
symbol to the individual accidentals.
Time signatures are analogous: mark their components (numeral_X, or possibly
whole-time_mark, alla_breve, or for weird cases use other_time_signature),
and overlay these components with the time_signature supersymbol.
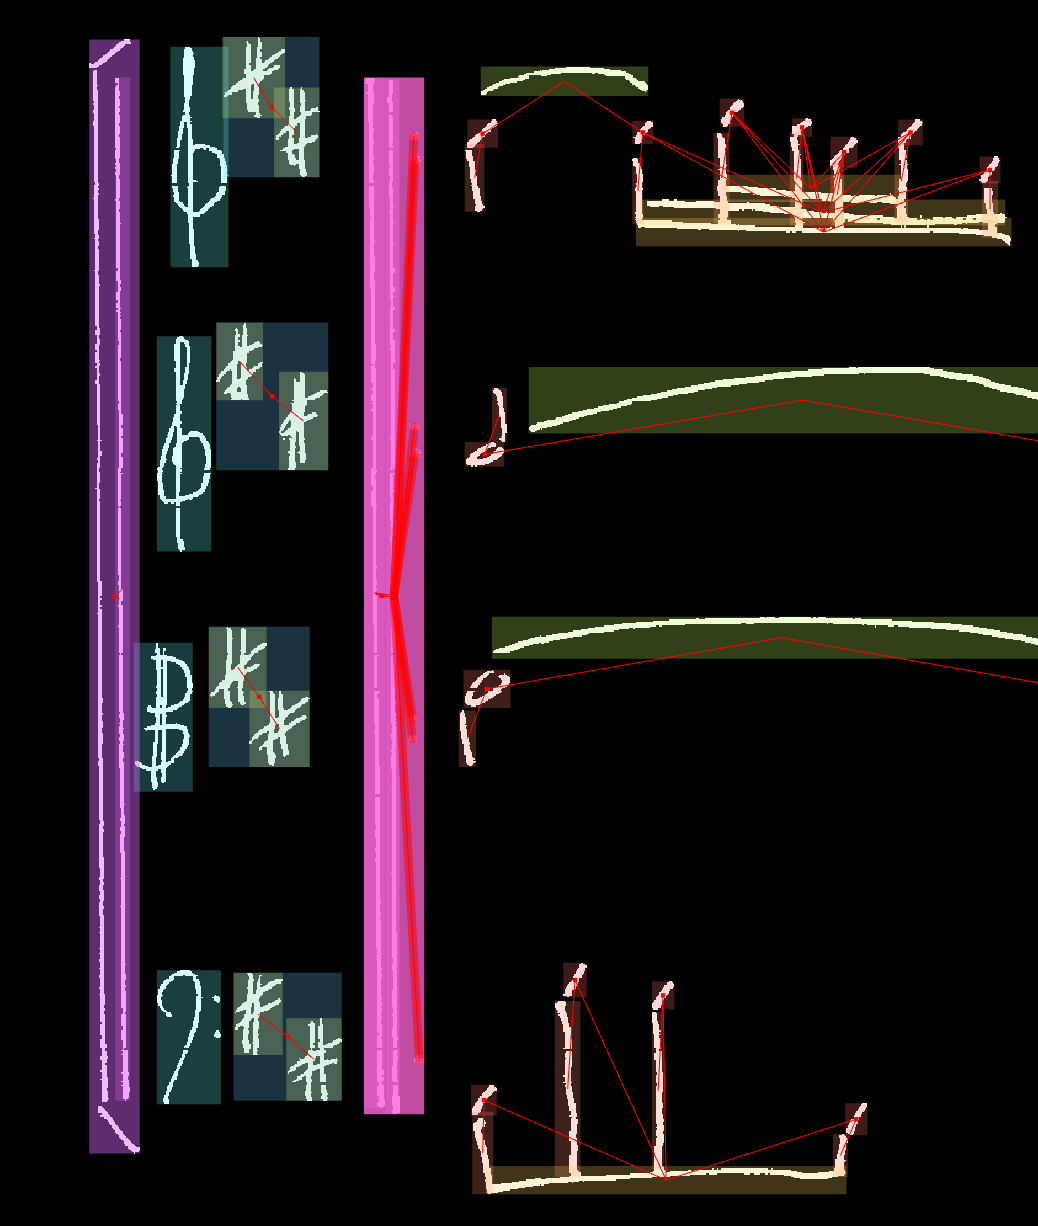
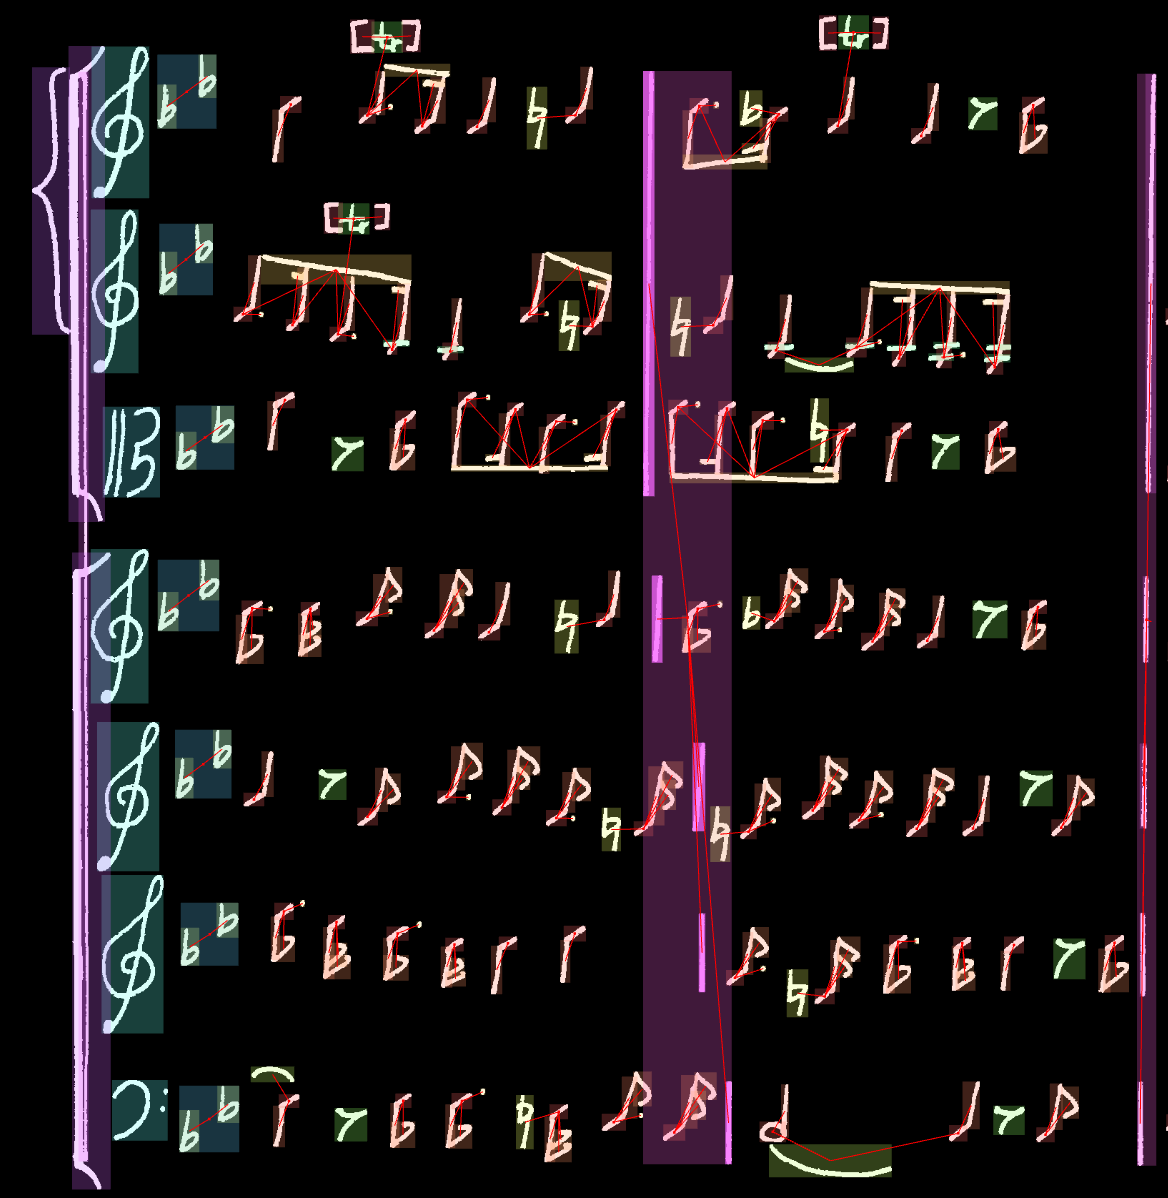
Here is a fully annotated region of part defaults, with the relationships
highlighted (the time_signature only consists of one primitive,
a whole-time_mark):
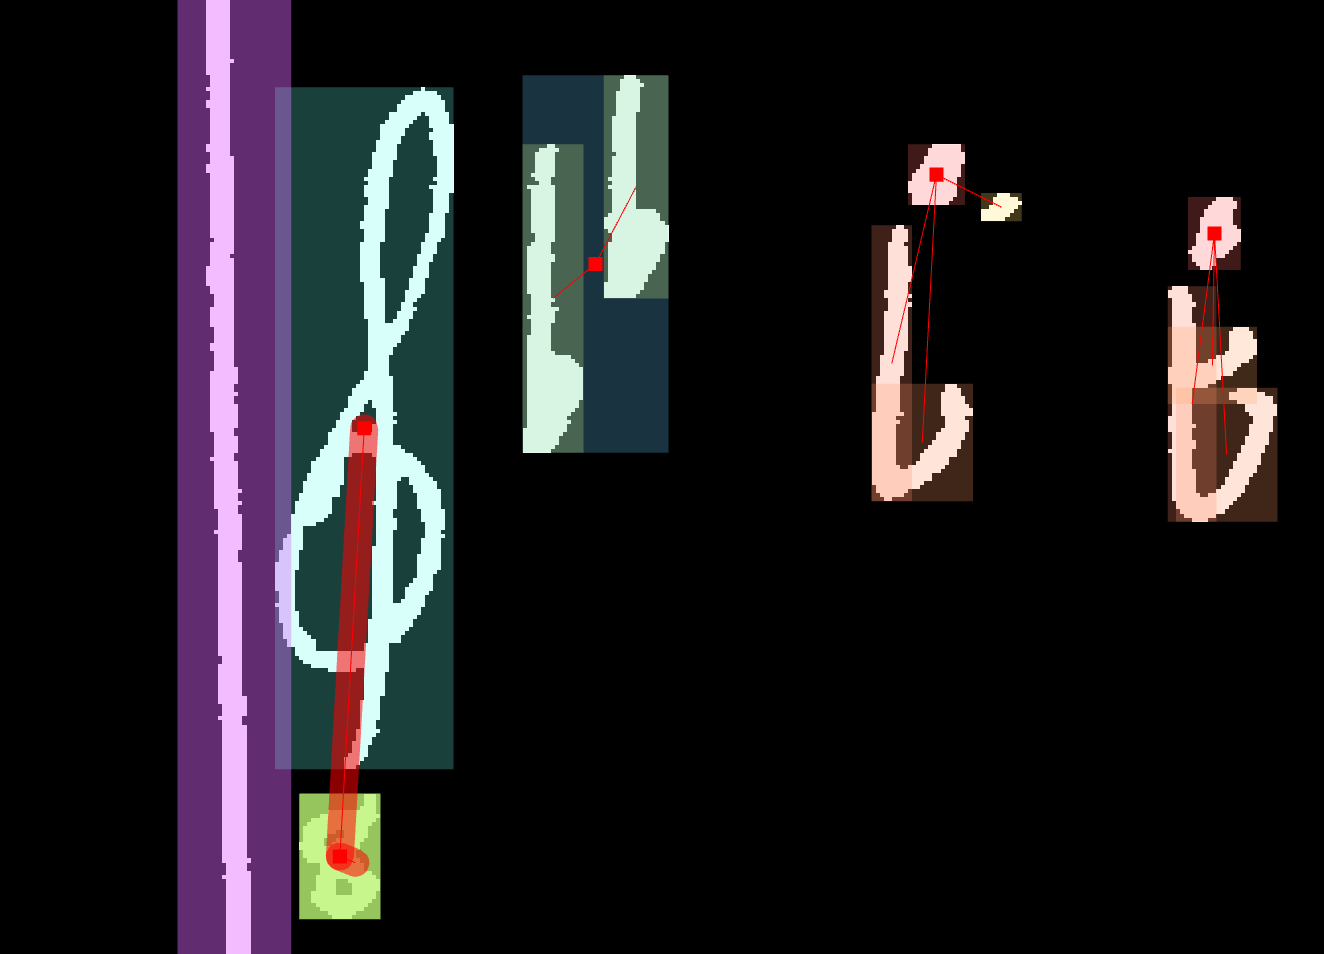
4.5.1. Clefs
Clefs in non-standard positions should be connected to the corresponding staffline.
To elaborate: a G-clef is in the standard position if its “swirl” is centered around the 2nd staffline from the bottom; the F-clef similarly is by default positioned on the 2nd staffline from the top, and the C-clef is by default found on the middle staffline. However, especially the C-clef can move around quite a lot: it can be positioned at any of the five stafflines. This is often done in cello, horn, or trombone parts, and is very prevalent also in choral parts in earlier music.
If this is the case, the clef should be explicitly connected to the staffline it is centered on (if anntoated). Use the “a” keyboard shortcut to do this.

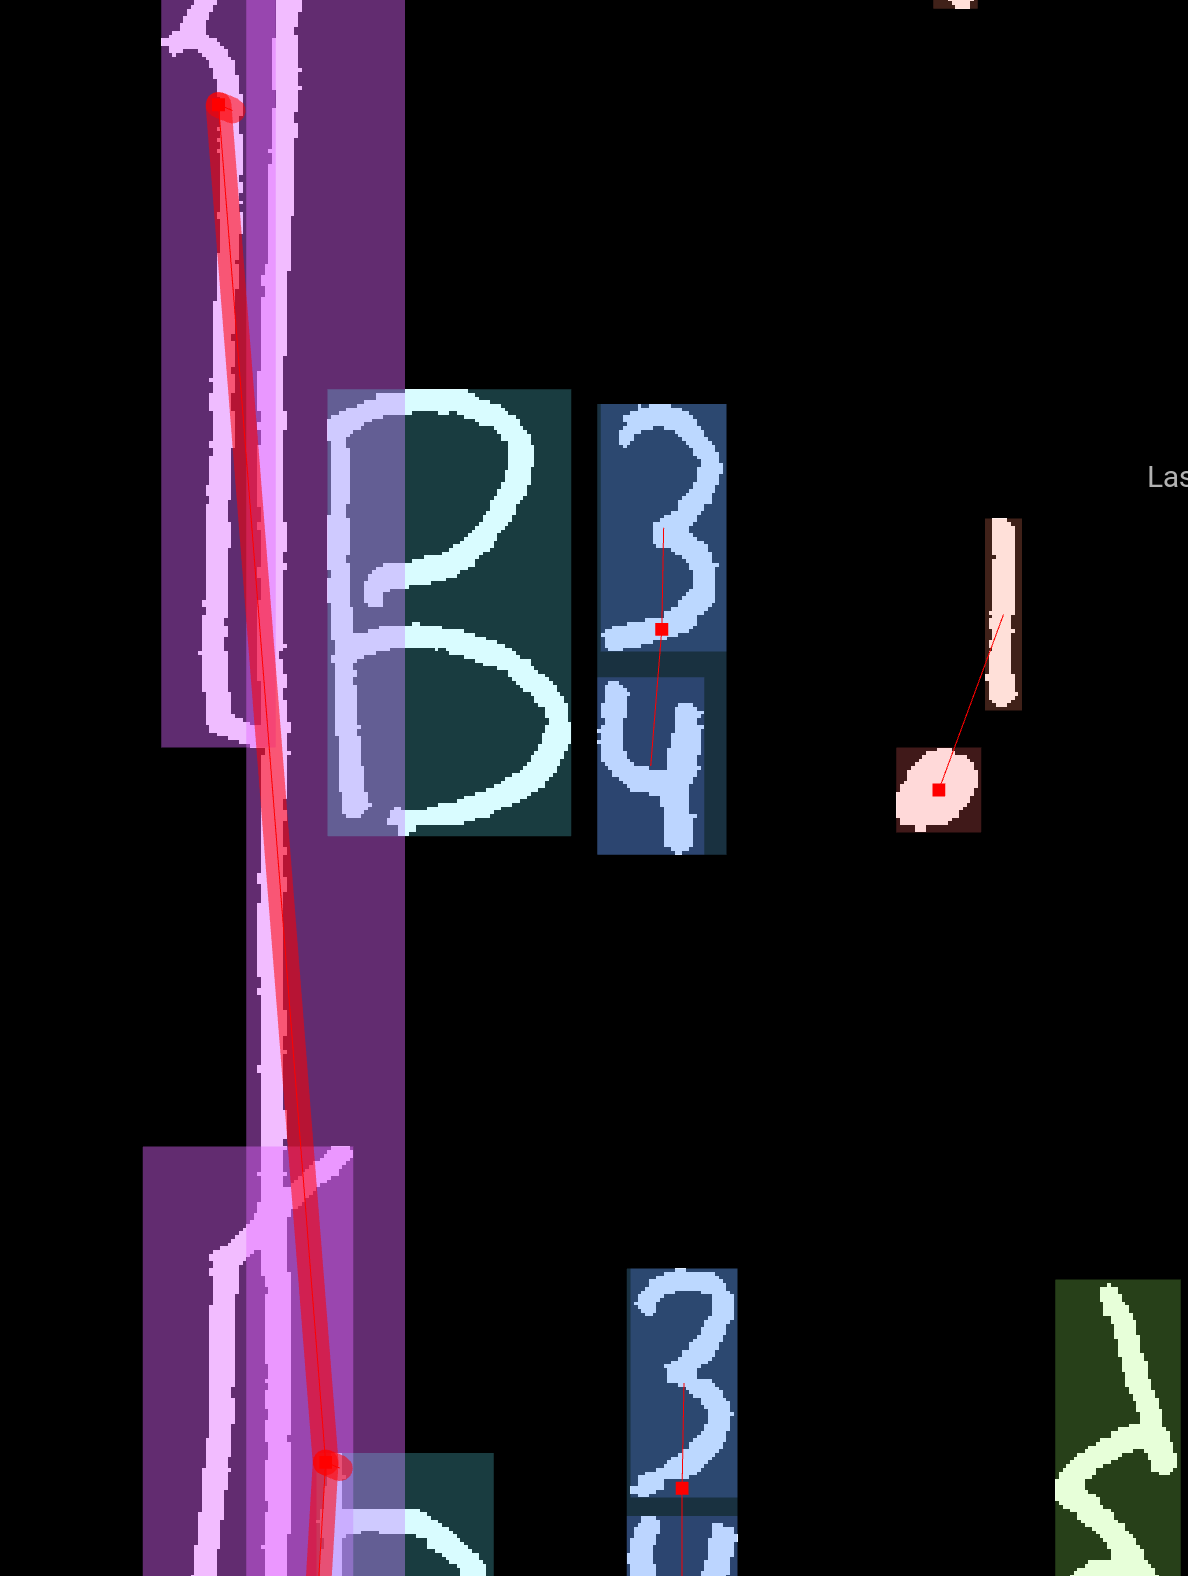
4.5.2. Time signatures
If the time signature includes some kind of separator between the upper
and lower (or left/right) numbers in the signature, denote it as letter_other
and add a relationship from time_signature to this letter_other.
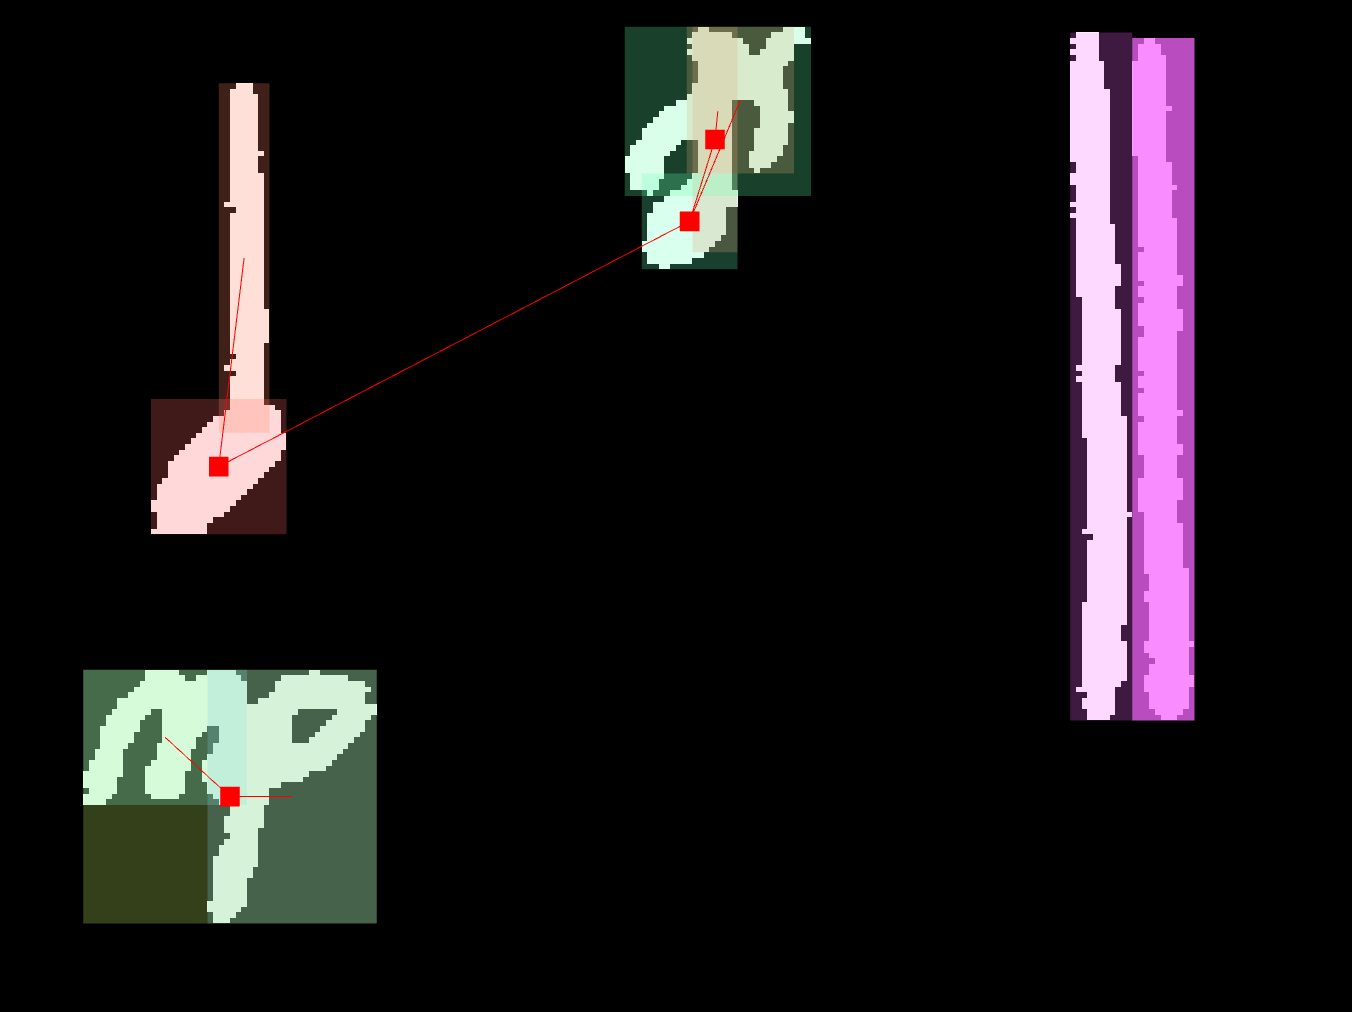
4.6. Text
A large part of notation is also expressed through letters that combine into different kinds of text:
- letters and numerals
- dynamics
- tempo
- lyrics
- figured bass
- bar and page numbers, rehearsal marks
- other
Letters and numerals are primitives, the other symbols group them together.
All texts that do not fall under one of the more specific categories
are other_text (or other_numeric_sign, if they only consist
of numerals and other-dot or letter_other).
Caution
The classification of texts is rather ad-hoc, and will probably change in future versions.
Note that dynamics_text only applies to markings like “f”, “pp”, “sfz”
and not to written-out “forte”, “piano”. This is because these dynamics-specific
texts are usually graphically distinct from other text on the page, with
distinct ligatures.
Tempo and dynamics change texts (“rit.”, “decr.”, “cresc.”, “reteneu”…)
are considered other_text. Expressive texts are also other_text.
4.7. Others
- unclassified
4.7.1. Unclassified
If there is a symbol you cannot identify, and at the same time
you are certain it is something, use the unclassified label.
4.8. Staffs
Caution
This section is new, written on 7. 8. 2017.
It is NOT REALLY IMPLEMENTED, and the relationships
should NOT be added manually – only through automated
scripts in the muscima package.
The last group of symbols are the stafflines and the staff. The
symbols are straightforward, and each staff has a relationship
leading to each staffline of which it consists. In early music,
for instance, there may be very different numbers of stafflines.
In modern music, unpitched percussion is often written
on an single-staffline staff.
The interesting part is how other symbols are attached to a staff and/or stafflines. Stafflines are primarily used to encode pitches, although the relationship of noteheads to the staff itself also participates in encoding the logical structure of voices. The pitch of notes is derived from their relationship of the corresponding notehead to the stafflines of the staff to which it is attached; however, to arrive at the final pitch, one has to find the pitch associated with each staffline; this is done by referencing the valid clef, key signature, and accidentals.
4.8.1. Notehead to staff
If a notehead is on a staffline, it has a relationship leading to that staffline (we are retainig noteheads as roots for now).
If a notehead is between stafflines, it should attach the staffspace, but because only nonempty symbols are annotated, it has to instead be attached to the two stafflines delineating that staffspace.
If a notehead is in one of the staffspaces just outside the staffline (e.g., g’’ or d’ when the standard G-clef is used), it is only attached to that one staffline.
Caution
This creates ambiguity that will need further resolution - either by introducing symbol properties, or staffspace “invisible symbols” – special automatically generated symbols that represent the empty space between and around the stafflines.
Note
How to define staffspace? Its mask could be the area delimited by the adjoining stafflines, and for the adjacent staffspace, one could use the average staffspace height of the staff at the given column. This of course leads to the inelegant problem with having to remember that this symbol is invisible… although it actually is there.
Note
Single-staffline staves do NOT have outer staffspace.
Note
Outer staffspace is currently NOT included into the staff mask. And it will probably stay that way.
4.8.2. Clef to staffline
Clefs are attached to the staffline which they mark.
While it is tempting to tie clefs to just the staff, this can create problems – especially with the C-clef. Clefs work by denoting a certain staffline as a certain pitch: for instance, the G-clef says “the staffline where this clef starts should be called G”, even though the G- and F-clefs, the most frequent clefs today, are overwhelmingly used in their standard positions, on the 2nd line from the bottom and top, respectively. Fortunately, clefs are not positioned on staffspace, so the trouble we had with noteheads is absent.
4.8.3. Key signature to stafflines
The accidentals in a key signature are tied to the staffline or staffspace they modify. (With the same caveats about staffspaces as noteheads.)
Again, as with clefs, the logic is that accidentals are relevant
for the given staffline only, even though by now it is quite standardized
to derive the function of the accidentals simply by counting how many there
are in the key signature. However, in early music, it is quite often
the case that one finds accidentals an octave apart, e.g. one flat
for B and another for b.
Technically, we could attach all accidentals to their stafflines instead of to their notehead, but we decided not to do that, at least until the staffspace situation is resolved.
4.8.4. Staff grouping to staff
Staff grouping has outlinks to the staffs it groups together. Although staff groupings can be recursive, each grouping has outlinks to all the staffs it groups, regardless of sub-groups.
4.9. Precedence Relationships
The relationships we have described so far have all dealt with syntactic attachment: a certain symbol (like a notehead) needs to be interpreted together with the other symbol (like a beam) in order for the musician to read the music correctly. However, there is another kind of relationship we need to record: precedence, or how the notes follow each other.
This is necessary in order to correctly interpret when to play a given note. You read music left to right, and you play the next note once you have finished playing its predecessor (in case of polyphonic music, its predecessor within the given voice). Therefore, in order to determine when to play a note, we need to know which note comes immediately before.
This is encoded by precedence edges, which are drawn between noteheads and rests that follow each other.

In monophonic music, this is trivial. In homophonic music (single logical voice, but there may be chords within that voice), this is also straightforward:

We encourage this type of “plank fence” structures, because they help check that all the notes in the chords have the correct durations (e.g., none of the noteheads in the beamed group is missing a relationship to a beam).
In polyphonic music, however, we have to start thinking about this. The key to getting precedence in polyphonic music right is to stick with the purely technical interpretation of precedence: play the note (or rest) at the right side of the relationship precisely when you finish playing the note on the left side of the precedence relationship. Do not think about the actual logical voices; simply think about when each note is supposed to be played.
Therefore, this is correct:

But this is correct as well (additional cross-voice precedence relationships highlighted):

And this is also technically correct, although very ugly and not encouraged:

Returning to the homophony example, this is therefore also correct:

Out of all such technically correct alternatives, we prefer those that are intuitively appealing, which in this case would be the first option:
- all valid precedence relationships within a voice,
- no edges across voices.
4.10. Changes in 0.9
Caution
Flags are labeled individually. The outermost flag is the 8th flag, the next one is the 16th flag, etc. See 16th notes in the example. (For 8th notes, nothing changes.)
4.11. Changes in 0.8
Caution
The following changes have been made to the original instructions, based on the testing round:
Aside from objects, we also have Relationships. Go re-read the Tutorial, please, and read these instructions thoroughly for how to apply relationships correctly to music notation primitives.
Dots have meaning. We now distinguish duration, staccato, repeat dots, and other dots.
Grace noteheads instead of grace notes. Where we originally
annotated a grace note as its primitives and then added a “grace note”
overlay, now we just annotate the primitives – but the notehead
of a grace note is not a normal notehead-full, there is a new
grace-notehead-full (or -empty) category.
Clefs are just one symbol. Dots are no longer marked separately for the F-clef (or any other clef that might come with dots). Just mark the clef.
Ties and slurs are marked separately. We had a curved-line
category for both ties and slurs, but from now on, we will mark
slurs as slur and ties as tie.
Key signatures and time signatures. Just like texts consisted
of letters and an overlapping text_box, time signatures and key
signatures now have their overlapping symbol as well. Mark the
primitives (sharps/flats/etc. for key signatures, numerals/other
time signature marks like alla breve for time signature) as usual,
and analogous to text boxes, add the key_signature or time_signature
“supersymbol”.
New text categories. Dynamics, tempo, instrument names, lyrics,
and rehearsal marks now have their own text category. Other texts
are, well, other_text. The rules for letters are still the same,
but instead of a general text_box, use the new text categories.
New symbols for articulation. Turns out we missed symbols like tenuto, accents, etc. – they have now been added to the class list.
New repeat supersymbol. Repeats are marked as thin-barline,
thick-barline, a bunch of repeat-dots, and then just like
the new key and time signatures, these primitives together should
be marked as a repeat symbol.
New tuple supersymbol. Tuples consist of a numeral primitive,
and potentially brace/line primitives (like tuples for quarter notes).
Their supersymbol is the tuple.
New ossia supersymbol. In case you see an ossia, annotate it
as usual and then apply the ossia supersymbol over all of the
primitives.
Nondestructive merge. For the “supersymbols” like text, time/key signatures and repeats, you can select all their component primitives, select the appropriate symbol class, and then press shift+m. This will save you some time, as the relationships between the supersymbol and its component primitives will be added automatically.